Swing Camera Installation And Setup Guide
-
-
Imaging Source Gig E Camera Setup
1. Components
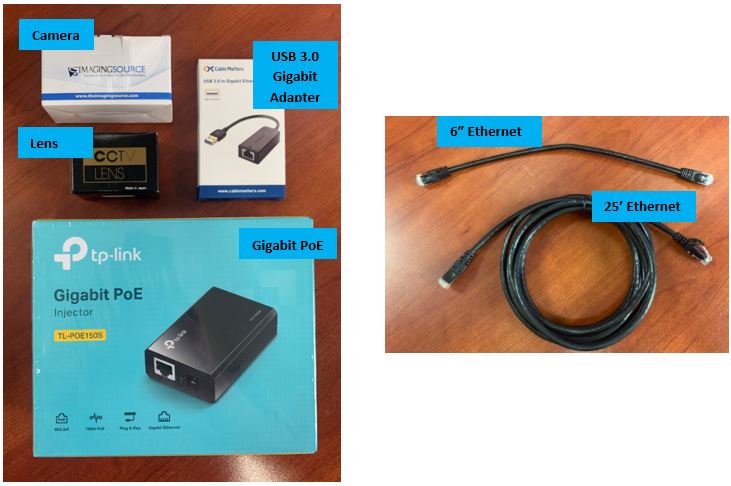
Each camera order should contain the following components:
GigE Camera
Lens
Cable Kit
6” Ethernet Cable
25’ Ethernet Cable
Gigabit PoE Injector
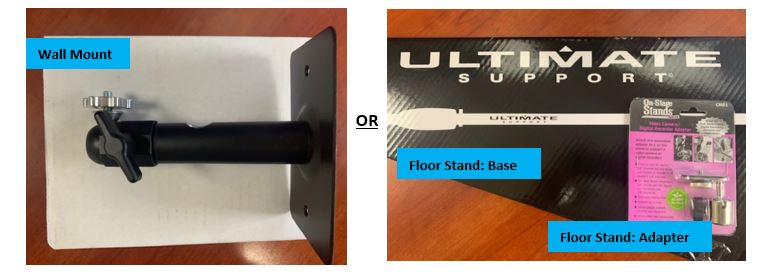
USB 3.0 Gigabit Ethernet AdapterMount (order specific: Wall Mount or Floor Stand)
2. Camera Setup
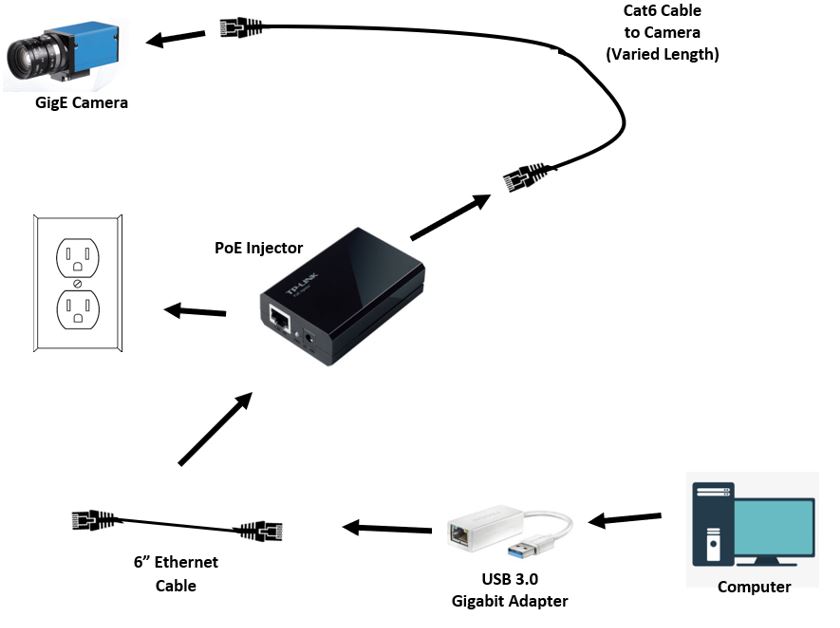
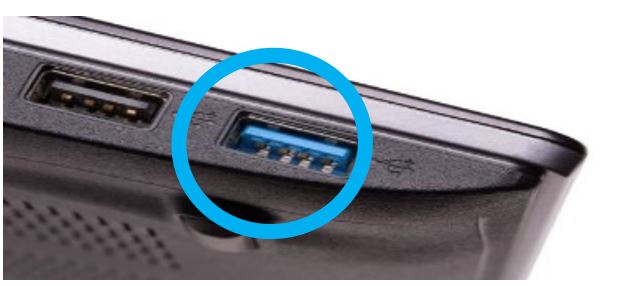
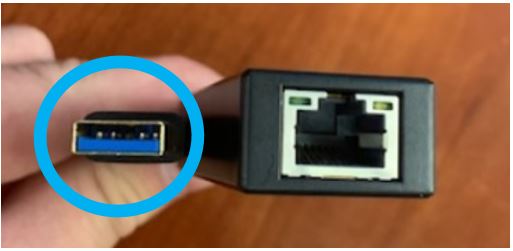
I). Take the USB 3.0 Gigabit Adapter and plug it into a 3.0 USB port on your computer. Locate the blue USB 3.0 port on your computer –
II). Plug the USB side of the adapter into the computer port. A blue light should appear indicating it is correctly recognized and connected. -
III). Next, connect the 6” ethernet port to the Gigabit Adapter’s ethernet input -
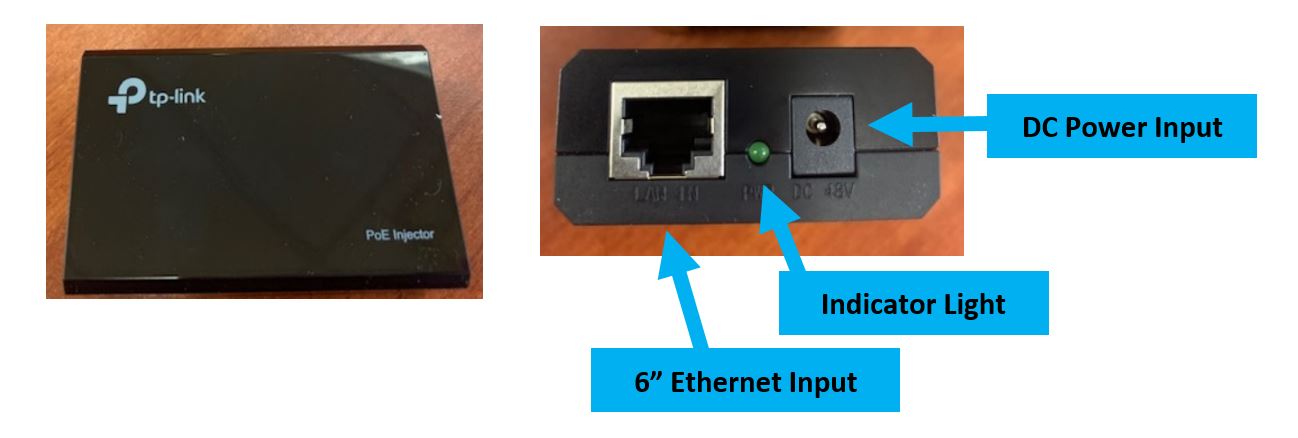
IIII). You will now need to install the Gigabit PoE injector: First connect the 6” ethernet cable to the “LAN IN” port on the injector. Then connect the DC power adapter to the input on the injector.
See below for identification:If the injector is receiving power, the green light will go on *blinking indicates an incomplete connection; the light will go a solid green once a camera is connected.
V). Next, connect the 25’ ethernet cable to the “LAN OUT” port on the injector:
3. Lens Installation
Now you will need to attach the camera lens. There are multiple options lens options.
If you have purchased these lenses:
9'-13' Range Lens (Part# 6701-1006)
11’-15’ Range Lens (Part# 6701-1007)
15’-20’ Range Lens (Part# 6701-1008)
4’-6’ Range Lens (Part# 3700-0059)Please use this guide.
4. Connecting a camera to a mount.
A) Wall Mount
I). Attach the wall mount to your chosen wall.
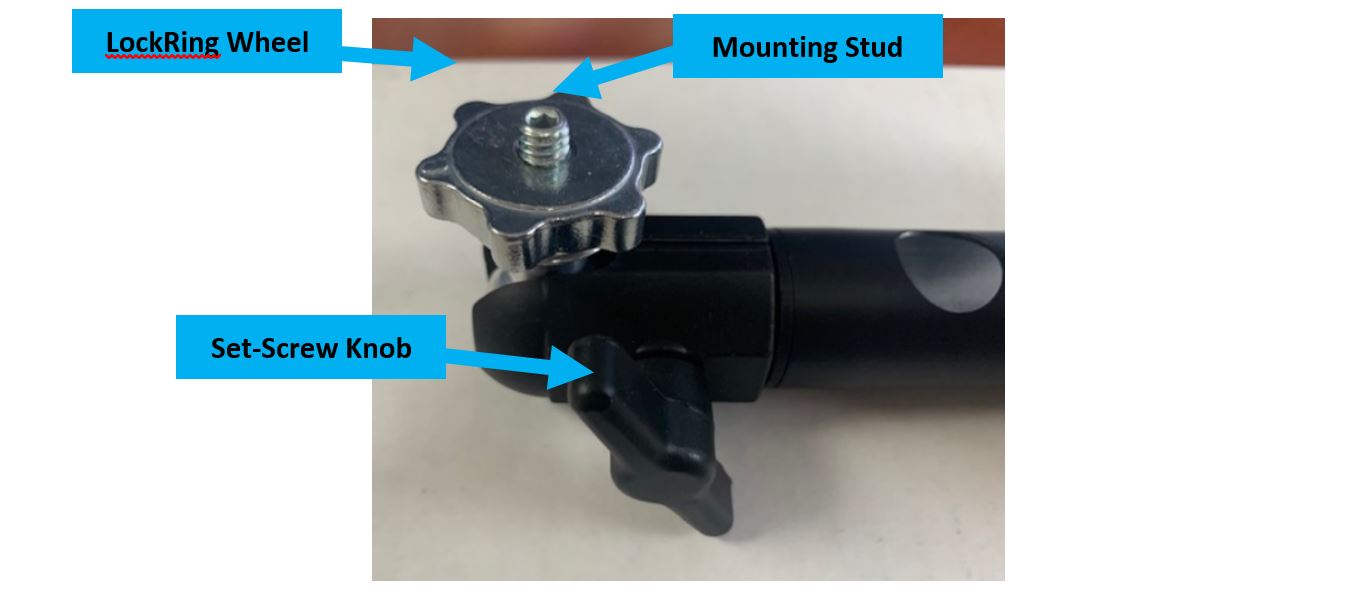
II). Loosen the lockring wheel.
III). Screw the camera to the mounting stud until tight and set in the desired direction.
*You may loosen the set-screw knob to allow the camera more motion when aiming.
IIII). Tighten the lockring wheel until the camera is tightened to the mount.B) Floor Stand Mount
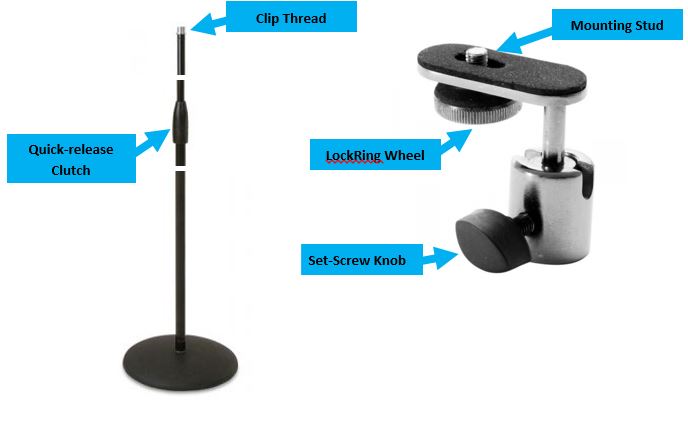
I). Assemble the Floor Stand
II). Install the video camera/digital recorder adapter to the clip thread on the floor stand.
III). Screw on the camera to the mounting stud, adjust the lockring wheel to tighten the camera to the mount.
*You may loosen the set-screw knob to allow the camera more motion when aiming.
IIII). Adjust the quick-release clutch to move the camera to the desired height.5. Now you can plug the 25’ Ethernet Cable into the camera.
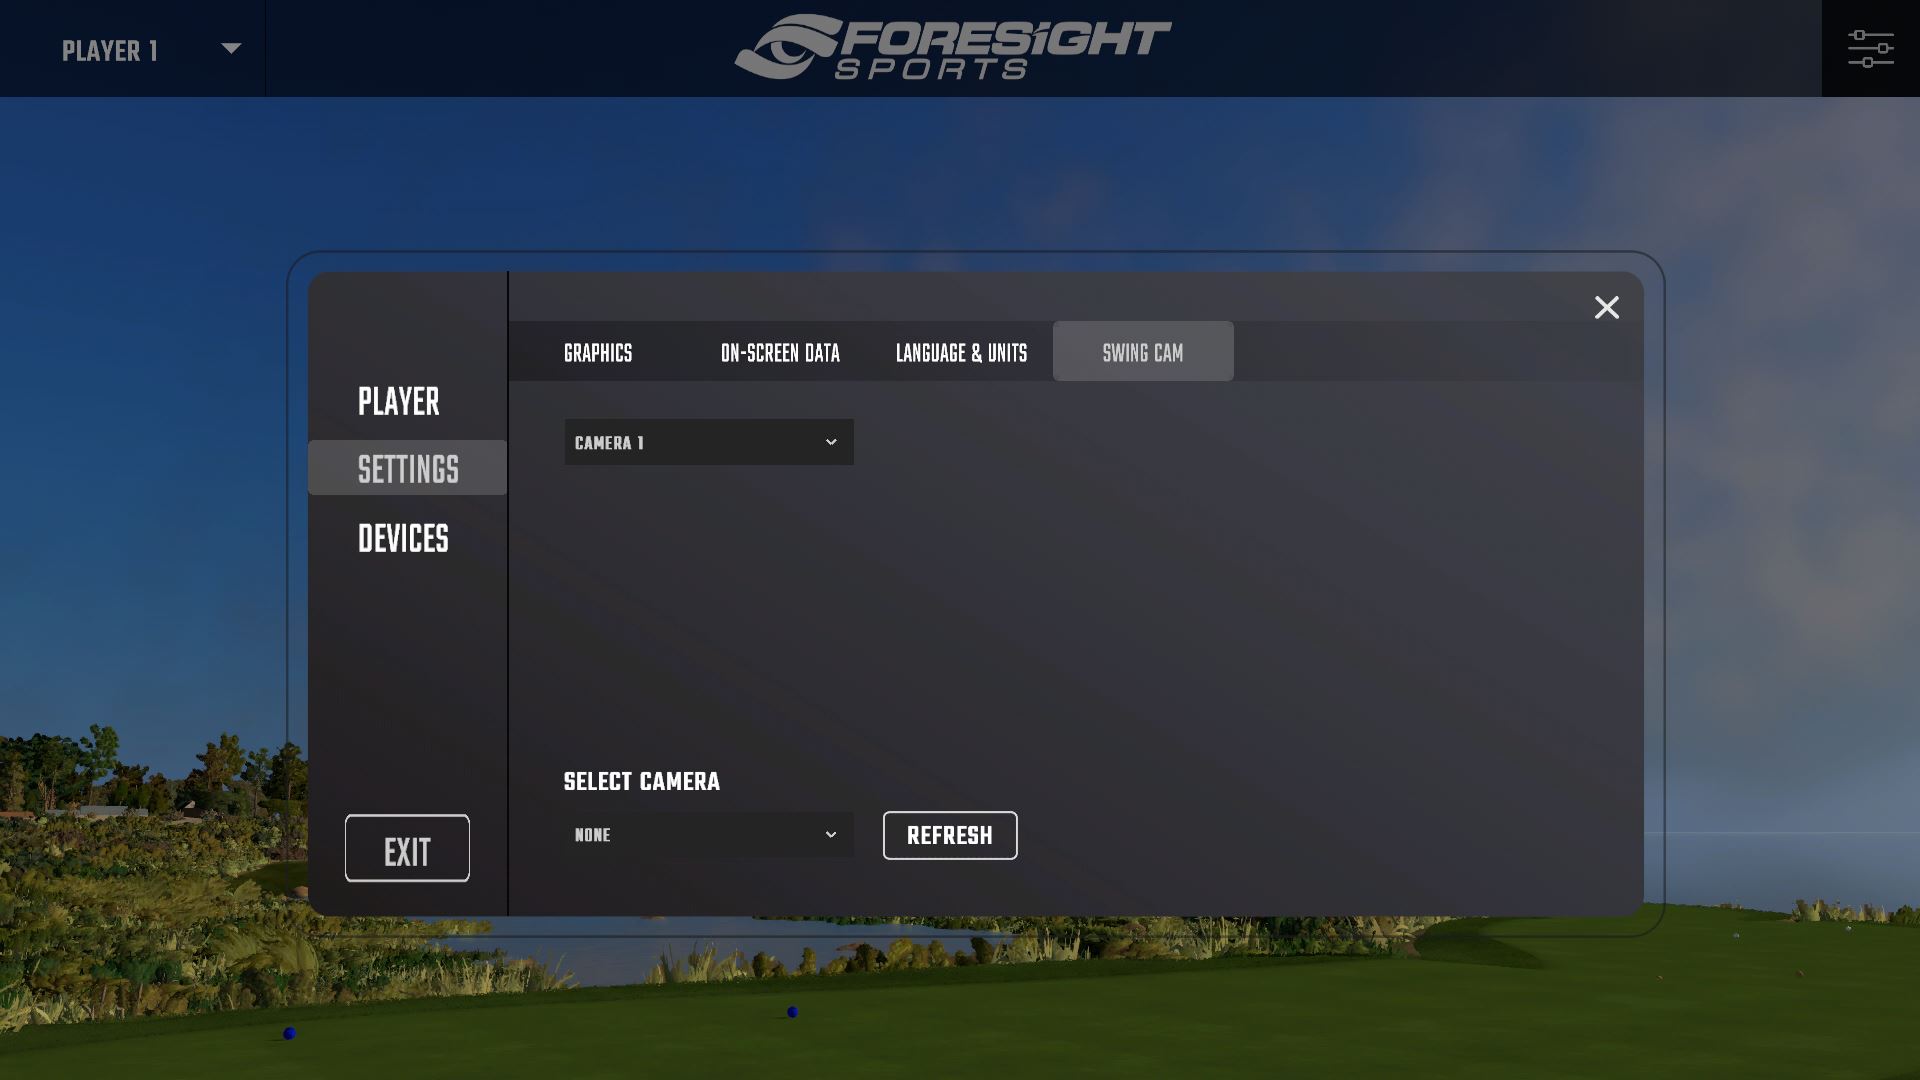
6. Congratulations the basic hardware setup is complete. Now load your FSX 2020 software and connect the camera, This is located under the settings tab. Then select the Swing Cam tab and select your device.
-
USB 3.0 Camera Setup
1. Components
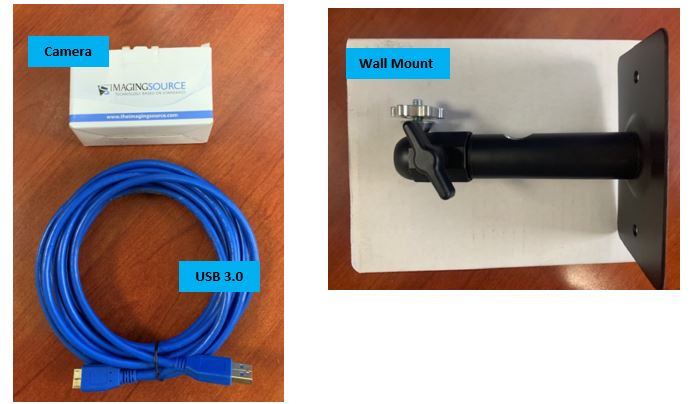
Each camera order should contain the following components:
Camera (lens already installed)
USB 3.0 Cable
Wall Mount
2. Camera Setup
Take the USB 3.0 Gigabit Adapter and plug it into a 3.0 USB port on your computer. Locate the blue USB 3.0 port on your computer –
3. Connecting a camera to a mount.
A) Wall Mount
I). Attach the wall mount to your chosen wall.
II). Loosen the lockring wheel.
III). Screw the camera to the mounting stud until tight and set in the desired direction.
*You may loosen the set-screw knob to allow the camera more motion when aiming.
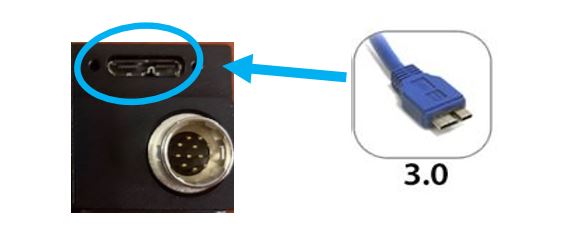
IIII). Tighten the lockring wheel until the camera is tightened to the mount.4. Next, connect the USB 3.0 Cable to the back of the Camera.
*The lens is preinstalled to the camera and has been focused prior to shipment.
5. Congratulations the basic hardware setup is complete. Now load your FSX 2020 software and connect the camera, This is located under the settings tab. Then select the Swing Cam tab and select your device.
-
Preparing Your Environment For A Swing Camera
A well-lit environment is essential to the high performance of your swing camera device. For example, shooting at a high frame rate, such as of 1000fps requires 5.25 times more-light than at 24 or 25 fps.
To obtain a clear, well lit, video with no blurring follow these steps:
1. Smooth video capture requires increased frame rate.
Frame rate refers to the number of individual frames that comprise each second of video of film you record, also known as FPS (frames per second.) The most common frame rates in video and film are 24, 25 and 30 frames per second. However, a good frame rate to capture club video would be 60FPS to 120 FPS. Frame rate is important, as the higher the frame rate the smoother your club will appear during the swing. For higher frame rate without decreased image quality you must increase the environmental lighting to adjust the required exposure to accommodate.
NOTE: To increase the frame rate you must decrease the exposure/brightness/gain settings on your camera or software. Adjusting your environmental lighting will be required to accommodate.
2. Ensure your Swing Camera is setup using a USB 3.0 cable and port (shown below In blue) and/or an Ethernet NIC connection for High Frame Rate communication to the camera.
3. To ensure better image quality at a higher frame rate you MUST increase the environmental lighting or increase/balance exposure. If the frame rate is higher, this may result in lower image quality.
Shooting at high frame rates requires substantial lighting levels. As the number of frame per seconds doubles, the amount of light required to achieve the same exposure also doubles. This can be demonstrated in the table below.4. Upgrading lighting for increased FPS.
It is recommended that you use adjustable intensity LED lighting, such as the ones shown below.
These lights can be purchased in kits that will come with stands, power adapters, and adjustable filters.
Recommended lighting solutions:
• Bi-Color LED Light Panel
• Adjustable Color Temperature: 3200K - 5600K
• 600+ bulb count LED boards
-




.JPG)
.JPG)
.JPG)