GC3 Firmware Update Guide
-
GC3/GC3s/Launch Pro Firmware Update Guide
The GC3/GC3s/Launch Pro allows you to update firmware directly through the device’s Touch Screen User Interface (LCD) using a local network connection.
(For Launch Pro Indoor users, please visit the LPi Support Page to download the appropriate updater.)
Local Network & Internet Required:
Connect your device to a local network using the RJ45 (Ethernet) port on your GC3/GC3s/Launch Pro and the included Ethernet cable. The local network and device must have internet access to complete the firmware update through the on-screen User Interface.To update the firmware using the internet through your local network please follow the steps below:
-
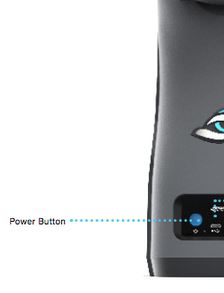
Power on your Device
If your device is powered off, locate and press the Power Button (pictured below):
Wait for Device to Power ON:
Screen 1:

Screen 2:


-
Connect your Device to Local Network
Select the QUICK LAUNCH MENU by pressing the tab in the top center of the display screen. Select the SETTINGS Option.

From the SETTINGS screen, select the WiFi Option:
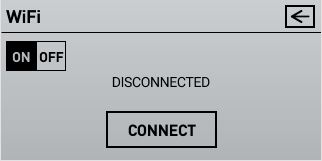
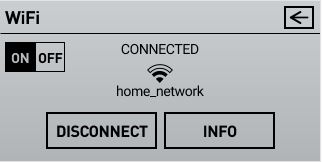
On the Wi-Fi Screen, confirm the Wi-Fi Option is set to ON. Then Confirm you are connected to a Local Network providing internet access. If needed, select to CONNECT to a Network:
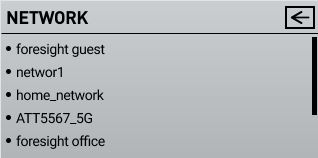
Select a Wi-Fi NETWORK from the List.
Enter the NETWORK PASSWORD for the network you selected if prompted:

Once the device is CONNECTED to a WiFi Network the WiFi Status will reflect Connected, with an option to disconnect if desired. The Info Option will reveal your Local Network Connection Settings should you want to review.
-
Navigate to Firmware Update on Device
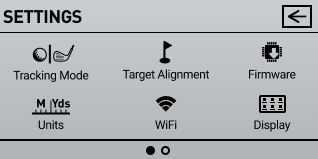
Select the QUICK LAUNCH MENU by pressing the tab in the top center of the display screen. Select the SETTINGS Option.
From the SETTINGS screen, select the FIRMWARE Option:
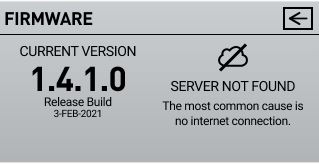
If your device does not have internet access you will be presented with a SERVER NOT FOUND option. This could also be caused by System Firewalls, or security provided by your Internet Service Provider. Please confirm all security measures have been removed before proceeding.
-
Update Your Firmware
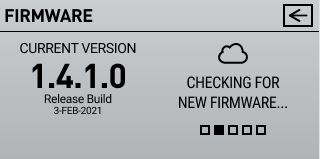
The FIRMWARE Screen will check the cloud server for NEW FIRMWARE UPDATES
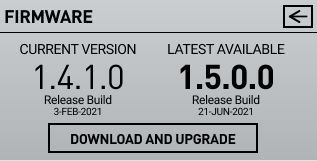
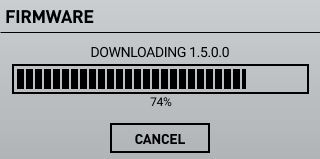
If there is an AVAILABLE UPDATE your screen will present the option to DOWNLOAD AND UPGRADE, select this option to proceed.
Please wait while your device first DOWNLOADS the firmware update.
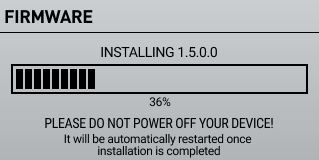
After the firmware is downloaded your device will begin the INSTALLATION process.
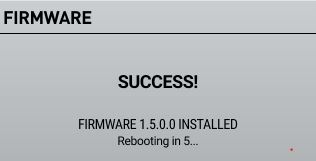
Finally, the device will confirm the UPDATE WAS SUCCESSFUL and will REBOOT to apply the upgrade.
-
Confirm Firmware Update
Select the QUICK LAUNCH MENU by pressing the tab in the top center of the display screen. Select the SETTINGS Option.
From the SETTINGS screen, select the FIRMWARE Option:
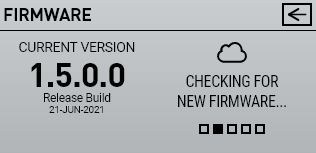
This version number should appear identical to the one downloaded and installed previously, confirming the update was successful!
-