QuadMAX User Manual
-
Introduction
WELCOME TO THE NEXT GENERATION
THANK YOU FOR CHOOSING THE QUADMAX
Welcome to the world of precision and performance with the Foresight Sports QuadMAX Premium Golf Launch Monitor. Designed for the discerning golfer seeking unparalleled accuracy and in-depth insights into their game, this cutting-edge device redefines the way you approach your swing.
Crafted with precision engineering and state-of-the-art technology, the Foresight Sports QuadMAX empowers golfers of all levels to elevate their gameplay. From recreational enthusiasts to seasoned professionals, this launch monitor offers a comprehensive suite of features tailored to enhance your understanding and mastery of the game.
Prepare to revolutionize your golfing experience. Whether refining your swing, analyzing ball flight data, or fine-tuning your performance, the Foresight Sports QuadMAX is your ultimate companion in the pursuit of excellence on the fairway.
-
Items Included

-
Feature Overview


-
-
Device Registration
The QuadMAX requires online registration renewal every 45 days. If the registration of your device has expired, all data channels from the QuadMAX (USB, Ethernet, WiFi, and BLE) will be blocked until registration renewal is completed. The QuadMAX will continue to work as a stand-alone device.
To review the remaining days left until registration renewal, go to the About > Features screen.
The QuadMAX is region locked and will only work in the region you purchased. To review the unlocked region, go to the About > Features screen. If you need to change this region, please reach back out to your sales team member.REGISTER THE QUADMAX
1. Connect the QuadMAX to Foresight Sports software applications (FSX Play, FSX 2020, or FSX Pro).
The QuadMAX will complete online registration every time it connects to a Foresight Sports software application, as long as the computer is connected to the internet. Registration will occur over all connection types and will renew even if registration has not expired. Registration can be confirmed by navigating to the About screen.
2. Connect the QuadMAX directly to the internet via Ethernet. The QuadMAX will complete online registration when it is connected via Ethernet cable directly to an Internet source (e.g. Router). Registration over Ethernet typically takes between 45-60 seconds and can be confirmed by reviewing the registration renewal date on the appropriate About screen. A restart may be necessary if registration is not successful on initial connection of Ethernet cable.
-
Getting Started
To properly use the QuadMAX, place the device upright on a level surface approximately 22” away from the hitting area. If a hitting mat is used, make sure the device is raised to the same level as the hitting surface. For extra stability on uneven surfaces, the kickstand can be deployed at the bottom of the unit.

POWER ON OFF
To power on the QuadMAX, press and release the power button. The device will display a start-up screen showing battery life, serial number, and firmware version. This will take approximately 30 seconds. The LED indicator will blink once the QuadMAX is ready for tracking. To power off the QuadMAX, press and release the power button again. The device will initiate its shutdown sequence and the LCD screen and LED indicator will turn off.

NAVIGATING THE MENU OPTIONS SCREEN
The QuadMAX Menu Options screen is accessible by pressing the Menu buttonon the upper left of the display. The Main Menu consists of the following options:
Tracking Mode
Speed Training
Settings
Session Capture
About
MyTiles
Target Align
Patents
System Info
Support

Touch the menu item on screen that you wish to select, touch the left facing arrow in the upper left to go back one screen. The Main Menu can be quickly returned to from any menu by pressing the Menu button.

-
Modes
Press the Menu button to display the menu offerings and then select the "TRACKING MODE" button to open the tracking mode options menu. The QuadMAX has three modes: ball, club, and putting. Ball comes automatically enabled with purchase, where club and putting are optional add-ons. If club tracking or putting module have not been enabled, select the "More Info" button to display a QR code that will take you to more information on how to enable these modes when the code is scanned with your mobile device.

-
Club Tracking
Press the ON or OFF buttons to enable or disable club tracking. If you have not purchased putting or club, scan the QR code provided on the QuadMAX screen.


When club tracking is enabled, the QuadMAX will track both the golf ball and golf club (with the club markers applied). In this mode, the device will have a green LED indicator zone. The QuadMAX will give both one-dot data and four-dot data based on how the club has been marked. Please see the section “APPLYING CLUB MARKERS” for details on how to place club markers for one-dot or four-dot data.

-
Ball Only Mode
When club tracking is disabled, the QuadMAX will track only the golf ball. In this mode, the device will have a blue LED indicator zone.

-
Putting Mode
From the Tracking Mode menu, press the On/Off button to enable or disable putting mode. When putting mode is enabled, players, fitters, and instructors will have access to an unprecedented amount of performance data from their putter – and with the accuracy and trust only Foresight Sports can deliver.


-
-
Ball Placement And Hitting
The QuadMAX on-screen placement aid displays the golf ball position relative to the hitting zone. The center of the zone sits approximately 22” from the front of the QuadMAX, and the zone varies in size depending on the mode. The zone is approximately 14” x 14” with Club Tracking enabled, and 18” x 14” with Club Tracking disabled.

-
Status Indicator
Switching between right and left handed mode can be done via the right-handed and left-handed tracking keys on the LCD screen. The current mode can be determined by the LED indicator.
Once a ball has been located by the camera, the on-screen placement aid will appear, and text will indicate one of the following device statuses.
LED BLINKS SLOWLY
Previous shot data shown on screen
No ball is detected by cameras.
LED BLINKS RAPIDLY
Ball out of hitting zone
The ball is not detected in the ball find zone and must be moved inside.
Too many balls detected
More than one ball is detected in the zone, excess balls should be removed.
LED REMAINS SOLID
Ready
The ball is inside of the hitting zone and the device is ready for the shot.
BLUE –BALL ENABLED
GREEN – BALL & CLUB ENABLED
PURPLE –PUTTING
AMBER- SWING SPEED TRAINING

-
-
My Tiles
The MyTiles feature on the Foresight Sports QuadMAX provides an opportunity for the user to customize the presentation and timing of data on the QuadMAX display. This feature works by pairing a QuadMAX to the Foresight App on a smartphone, creating a custom preset, then pushing the preset to the QuadMAX.
Pairing QuadMAX and Foresight App
Pairing the QuadMAX and Foresight App can be done in two ways. The first method for pairing is to navigate to the MyTiles section of the device menu so that the QR code is displayed on screen. The presented QR code can now be scanned by a smartphone. If the smartphone does not have the Foresight App installed, the device will navigate to the app store for installation of the app. If the smartphone does have the app, the app will open, pair with the QuadMAX device, and allow for MyTiles customization. The second method, from the Foresight App a scan for devices can be performed. Ensure that the QuadMAX is powered on and in Bluetooth range prior to executing a device search from the Foresight App. Scanning for devices will show all devices that are powered on and in range and the connection can be made by selecting the device with which connection is desired.
Creating a new MyTiles preset
From the MyTiles section of the Foresight App, new presets can be created and pushed to the QuadMAX. To create a new preset, the number of screens must be selected (up to 3 screens), then select each screen to determine which data to display. The data can be displayed in pre-selected configurations of 1, 2, 3, 4, or 6 data tiles. Select the data that will be displayed on screen 1, then select the desired time for screen 1 to be displayed. Repeat this process for the remaining screens. Once the MyTiles preset has been established, it must be named and then pushed to the QuadMAX as the active data preset. In the Foresight App multiple MyTiles presets can be created and a maximum of 5 preset can be pushed to the QuadMAX. The active preset can be changed on the QuadMAX device by navigating to the MyTiles menu.
MyTiles Menu
From the QuadMAX home screen the MyTiles menu can be accessed by pressing the Main Menu button, then pressing the MyTiles button on screen. From the MyTiles menu, a preset can be selected as the active MyTiles preset. The default data display configuration can be selected by the “DEFAULT” preset. Additional instructions on using the MyTiles feature can be found within the Foresight App.

-
Session Capture

Press the Menu button to display the menu offerings and then press the "SESSION CAPTURE" button to access this menu item. Press the "START NEW SESSION" button to begin a Session Capture. The Session Capture feature offers a way to capture data from a practice session that later can be pushed from the QuadMAX to the Foresight App and reviewed after the session. Once a Session Capture has begun, a [rec] icon will show up on the ball find screen indicating that the session is open and shot data is being saved. When done, the session can be closed by either powering off the QuadMAX or returning to the "SESSION CAPTURE" menu to close the session.
Sessions can be retrieved from the QuadMAX by pairing the device with the Foresight App and retrieving sessions. Once a Session Capture has been retrieved to the Foresight App from the QuadMAX, the session will be permanently removed from the QuadMAX. The QuadMAX is capable of saving up to 5 sessions and will indicate how many sessions are currently stored on the device in the Session Capture menu. Navigate to the Foresight App instructional section for more detail on how to retrieve saved sessions.
-
Speed Training
Press the Menu button to display the menu offerings and then press the "SPEED TRAINING" button to access this menu item. Press "START" to begin the swing speed training mode. The status light will indicate SPEED TRAINING mode by blinking an amber color. The SPEED TRAINING mode puts the QuadMAX into a state where it is no longer looking for a ball or ball launch to capture swing speed data. The QuadMAX will continuously look for a club with a single fiducial to pass through the hit zone and will display club head speed as a single data point on screen when this event is detected. SPEED TRAINING mode will time out after 5 minutes without detecting an event and return to default ball find behavior.
To best use the Speed Training mode, place a marker down in the middle of the hit zone to help guide the appropriate place for speed training swings. This can be done by putting the QuadMAX in standard launch detect mode (ball or club enabled are both acceptable) and placing a ball down in the middle of the hit zone using the QuadMAX display to guide ball placement. Once the center of the zone is found, replace the ball with a small flat marker (a ball marker or tee pushed all the way into the ground will work well). The QuadMAX can now be set into Speed Training mode and swings should be taken directly over the marker that has been placed.

-
Target Alignment
The “TARGET ALIGN” menu does not need to be accessed to set a downrange target. Simply lay your Foresight Sports alignment stick (provided with the QuadMAX) down in the ball find zone, aligning the stick with the downrange target. The QuadMAX will chime, and the LEDs will blink, indicating that it has adjusted alignment as well as indicate on screen how the alignment has been adjusted. Target alignment can be adjusted up to 10° on the QuadMAX via the FSS Alignment Stick.

Once the QuadMAX has chimed, the alignment stick can be removed from the hit area and the new target line has been set.
Checking and resetting the alignment can be done from the “TARGET ALIGN” menu. Press the Menu button to display the menu offerings and then press the "TARGET ALIGN" button to access this menu item. The target alignment screen shows the current alignment configuration of the device.

If the alignment has not yet been adjusted, the display will read “DEFAULT CONFIGURATION.” To reset the target alignment to the default, press the RESET button on screen.

After a few seconds, both LED indicators will show yellow and the unit will give an audible tone. The new alignment angle will be shown on the LCD screen.
Alignment can be viewed and reset at any time from the Target Alignment menu in System Options. To reset alignment to factory default in this screen, press the OK key. Alignment is always reset when the unit is powered off.
-
Settings
Press the Menu button to display the menu offerings and then press the "SETTINGS" button to access this menu item. Once a setting is changed, it will be automatically saved once the screen is exited.

System Info
Press the Menu button to display the menu offerings and then press the "SYSTEM INFO" button to access this menu item.
Within the diagnostics menu there are four screens which can be cycled through by pressing the desired screen number in the upper left. The first (default) screen provides you with the option to save the images needed to diagnose issues or questions with the performance of the device. This shot saving is a troubleshooting tool, not a way to record session data. During shot saving, the file names will be displayed. Shot saving can take up to 60 seconds. Once your device is connected to a computer via USB, you will be able to retrieve saved shots if necessary to share with tech support.
The second screen shows battery diagnostic information and firmware version. The third screen shows sensor diagnostic information. The fourth screen shows system diagnostic information including available flash memory and shot/session information.

About
Press the Menu button to display the menu offerings and then press the "ABOUT" button to access this menu item. There are four About screens, which can be cycled through by touching on the desired screen number in the upper left.
The first (default) screen displays the QuadMAX serial number and a QR code to help obtain and pair the device with the Foresight App. The second screen displays the various on-board firmware versions, model number, date of manufacture, and hardware version. The third screen displays the status of the available add-on modules. The fourth screen displays system information.

Patents
Press the Menu button to display the menu offerings and then press the "PATENTS" button to access this menu item The patents page provides a list of both national and international patents for the device as well as authorized territory information and copyright information.

GET SUPPORT
Press the Menu button to display the menu offerings and then press the "GET SUPPORT" button to access this menu item.
The Get Support page offers access to Foresight Sports tech support by scanning the presented QR code. Scanning this QR code with a phone or tablet will navigate to the Foresight app on the app store, or if the Foresight app is already installed, open the app to assist with support. On this page the device serial number and firmware version are available for quick reference.
-
Applying Club Markers
In order to capture club data with the QuadMAX, club markers must be applied to the clubface. To apply markers using the dispenser (included):


Four Marker Placement
Count the club’s score lines to determine the vertical center of the clubface.
Note: For clubs with an even number of score lines, the vertical face center will be between the center two score lines. For clubs with an odd number of score lines, the vertical face center will be directly on the center score line.
Carefully apply the first two markers along the vertical center of the face near the outer edge of the score lines,* keeping both markers level with each other.
The center point between these two markers will define the horizontal center of the face.
Carefully apply the last two markers on the toe of the club face at the top and bottom edges of the ball strike zone.

Four Marker Placement For Irons
From the bottom of the club, count score lines up to find the approximate vertical hitting center.
Carefully apply the first two markers between the sixth and seventh score lines at the toe and heel, keeping both markers level with each other.*
The center point between these two markers will define the horizontal center of the face.
Carefully apply the last two markers on the toe of the club face at the top and bottom edges of the ball strike zone.

Single Marker Placement
For best results, place the marker high on the clubface and as close to the horizontal center as possible.

-
Connecting The Device
The QuadMAX can be connected to other devices by USB, Ethernet, WiFi and BlueTooth
Note: This device is only intended for use on a private and secure network.
Ethernet:
-A preferred connection to directly connect to a PC for connection to the FSX gaming environment
-Appropriate connection for connecting to a network
For direct connection, plug one side of the ethernet cable to your QuadMax and the other to your PC.
For network connection, plug one side into your QuadMax and the other to your network.
USB:
-A preferred connection for PC connection to the FSX gaming environment
-The only connection for firmware updates
Connect USB-C to your Foresight device, connect USB-A to PC.
WiFi: (Password: FSSPORTS)
-Appropriate connection method for Foresight App
-Appropriate connection method for PC connection to FSX gaming environment
BlueTooth:
-Preferred connection to Foresight App
-Will not connect to a computer for FSX gaming environments
-
Maintenance
Battery Care (Removing The Battery)
Turn the unit off and disconnect from external power source.
Deploy the kickstand at the bottom of the unit to expose the battery.
Firmly press on the blue battery release levers in the direction indicated on the battery.
Once battery is released, gently remove from the device.

Inserting A New Battery
With kickstand deployed, properly align battery as shown.
Gently slide battery into device.
Once inside, firmly press on battery to lock into place.

Proper Battery Care
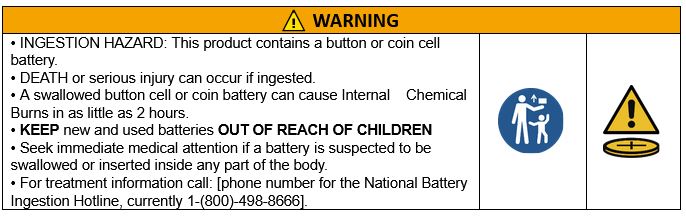
The battery in your QuadMAX has been designed to provide safe, reliable operation. However, the life of your QuadMAX battery and its ability to hold an adequate charge is dependent upon a regular routine of fully discharging and recharging the battery. Without regularly performing this discharge/recharge routine, the QuadMAX battery life expectancy can be compromised significantly.
IMPORTANT! Your QuadMAX battery should be fully discharged and recharged at least once a month. This includes batteries in storage, as well as batteries in QuadMAX devices operating on continuous AC power.
Storage And Maintenance
Prior to storing the QuadMAX, always make sure the device is powered off and the battery is removed. Foresight Sports strongly recommends storing the QuadMAX in a cool, dry environment in its original foam-lined packaging or specially designed carrying case to prevent damage.

-
Regulatory Compliance And Certifications
-
GCQuad Firmware 3rd Party Library Licenses
Component
License
B4090403_A2.cmd
TI BSD-3 Clause
Microsoft OS descriptors
https://learn.microsoft.com/en-us/previous-versions/gg463179(v=msdn.10)?redirectedfrom=MSDN
uECC.c
BSD 2
vector
https://github.com/MegaManSE/willperone/blob/master/Math/vector2.h
https://github.com/MegaManSE/willperone/blob/master/Math/vector3.h
https://github.com/MegaManSE/willperone/blob/master/Math/vector4.h
zlib
TI XDC Tools v3.31.03.43
TI SYS/BIOS 6.42.03.35
TI RTOS 2.16.01.04 for TIVA C
slld.c
https://github.com/ankurag12/NOR-Flash-File-System/blob/master/Spansion/slld.c
jsmn
imglib-2 64+ v2.1.0.0
https://software-dl.ti.com/sdoemb/sdoemb_public_sw/imglib/3_0_2_1//exports/Software_Manifest.html
-