GCHawk Guide
-
Intro
-

Thank you for choosing the Foresight Sports GCHawk. This guide will outline the safety requirements, installation process, setup, and troubleshooting guide for your GCHawk’s installation. Should you need more assistance, please review the GCHawk Product Support Page.
-
-
Safety Guidelines
Please read the following before use. Failure to follow the instructions could result in serious injury, property damage and/or void the device warranty.
-
All Installations Should Be Performed By A Licensed Contractor
All installation work described in this guide should be performed by licensed contractors. Improper installation may result in personal injury, property damage, and void any product warranty. The installation work should be performed by at least two (2) qualified installers.
-
GCHawk Ceiling Mount Precautions
1) The ceiling mount is designed specifically for mounting a GCHawk to a ceiling. Do NOT attempt to mount additional items to the provided mount, as the additional weight may result in damage and/or failure.
2) Do NOT install the wall mount in a location where vibration or impact shock may occur. This may result in damage to or failure of the mount.
3) Prior to installing the GCHawk mount, make sure the ceiling area is strong enough to hold the GCHawk and mount. If the ceiling area is not strong enough, reinforce the area prior to installation.
4) Never modify the ceiling mount, assembly components, or GCHawk.
5) Do NOT install the ceiling mount and GCHawk in a location where the operating temperature for the GCHawk may be exceeded. Excessive temperatures may damage the GCHawk. Install the ceiling mount in a place free from excessive dust and humidity to prevent the lens or optical components of the GCHawk from becoming clouded or dirty.
6) Do NOT use excessive force when adjusting the ceiling mount or GCHawk.
-
Components
1) Handle and install the power cord carefully. Incorrect installation may result fire or electric shock. Observe the following precautions when installing:
- Do not handle any electrical components with wet hands.
- Do not use a power cord that appears to be damaged or modified.
2) Tighten all screws firmly after installation and final adjustment.
- Do NOT use adhesives, lubricants, or oils to install and/or adjust the ceiling mount.
- Do NOT loosen the screws after installation.
- When performing electrical installation, make sure that no wiring comes into contact with mounting or assembly screws.
GCHawk (x1)
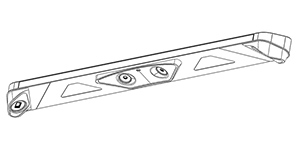
- Height - 6.081 in
- Length - 89.117 in
- Width - 7.561 in
- Weight - 36 lbs
Ceiling Mount (x1)
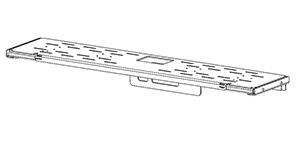
- Height - 3.937 in
- Length - 34.898 in
- Width - 6.772 in
- Weight - 4 lbs
Sliding Plates (x2)
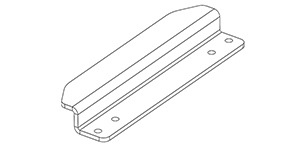
- Height - 0.743 in
- Length - 6.248 in
- Width - 1.875 in
- Weight - 0.17 lbs/ea.
Sliding Plate Hardware (x4)
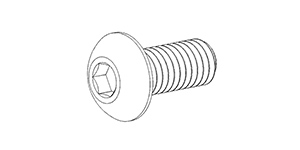
- 4x 10-32 Screws
Power Supply (x1)
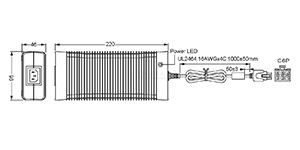
- Height - 1.811 in
- Length - 8.661 in
- Width - 3.740 in
- Weight - 2.756 lbs
- Input Voltage - 85 VAC to 264 VAC, 120
- VDC to 370 VDC
- Output Power - 280.32 W
- Output Voltage - 48 V
- Output Current - 5.84 A
- DC Output Connector - 6 Pin Mole
Power Supply Input Cord (x1)
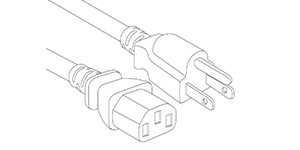
- Length - 6 feet
Ethernet Cable (x1)
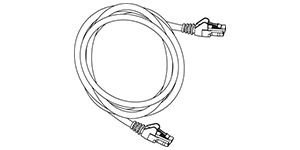
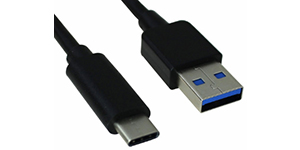
USB to USB-C Cable (x1)
Power Supply Output Extension (x1)
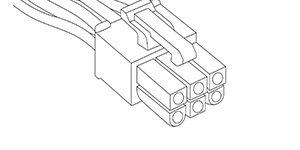
- Length - (made to order)
Power Supply Bracket (x1)
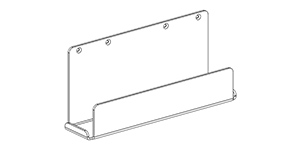
- Height - 4.25 in
- Length - 8.5 in
- Width - 2.1 in
- Weight - 0.65 lbs/ea.
Power Supply Hardware Set (x2)
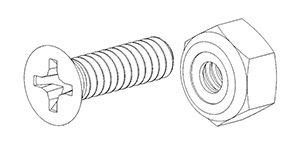
- 2x 6-32 Screws
- 2x 6-32 Locknuts
Calibration Wand
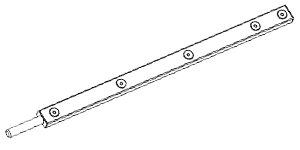
- Height – 1.18 in
- Length – 41.25 in
- Width – 2.07 in
- Weight – 15.35oz
Wireless Power Remote
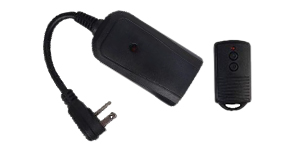
- Height – 5.75in
- Length – 6in
- Width – 1.5in
- Range – 100ft
- Weight – 0.182lbs
- Control Battery – 12V Type A23
Please Note: This installation package does NOT include screws for securing the GCHawk mount into the ceiling. Selected installation screws must be able to support a minimum of 50 lbs.
-
-
Installation
Please refer to the pre-installation checklist and safety guidelines before proceeding.
-
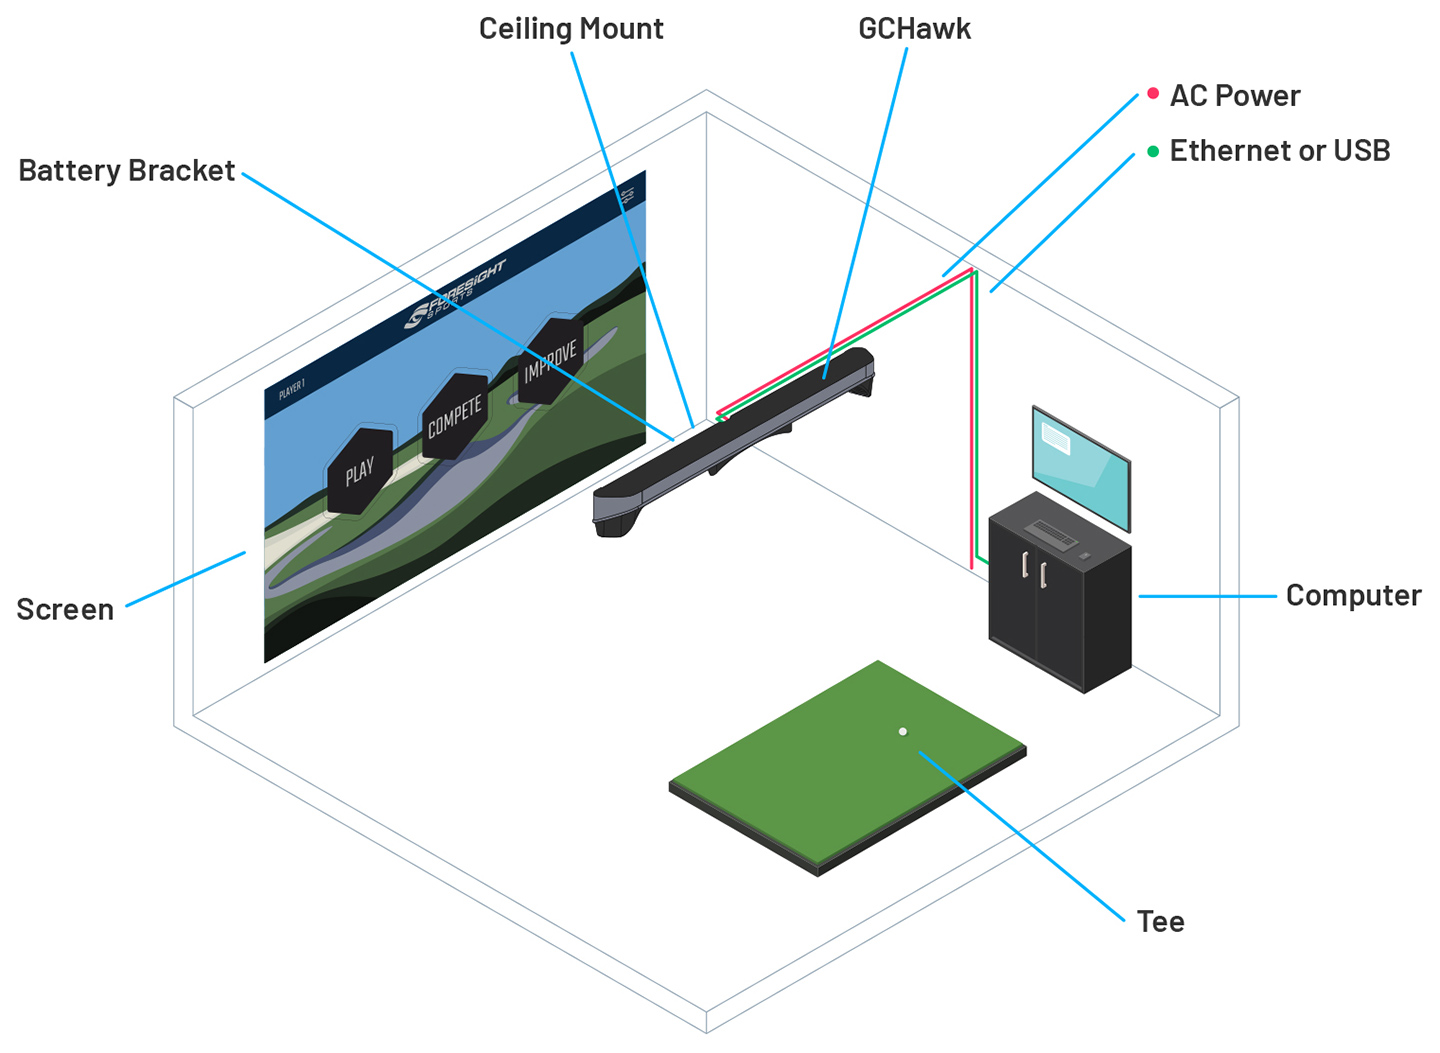
Installation Layout
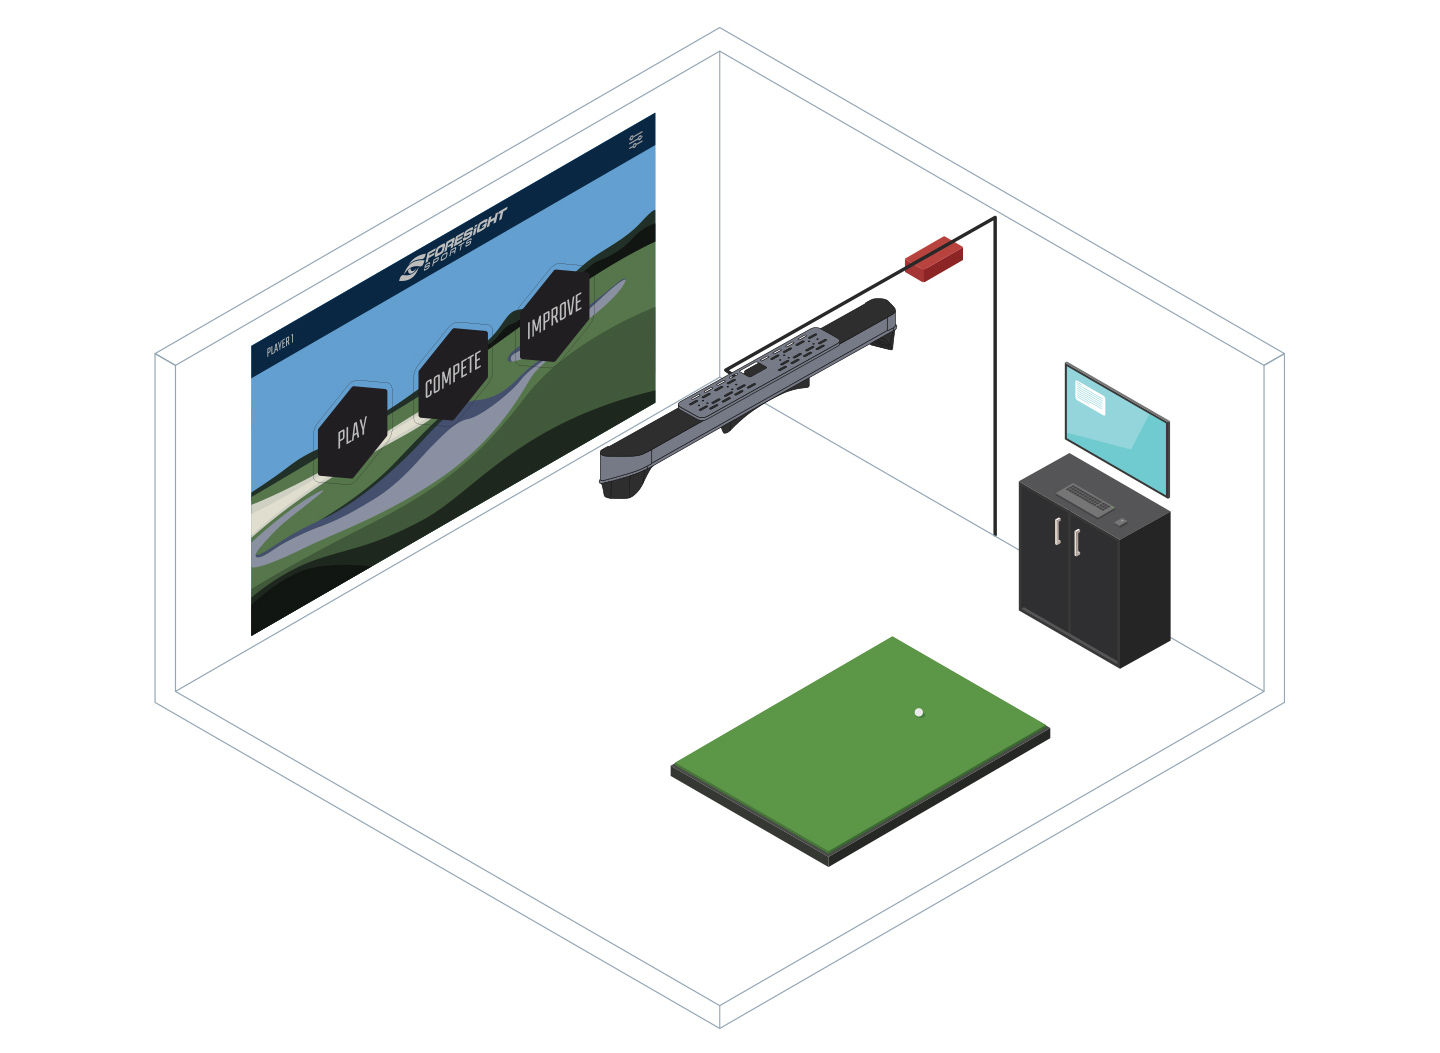
The illustration below depicts the ideal GCHawk installation configuration.
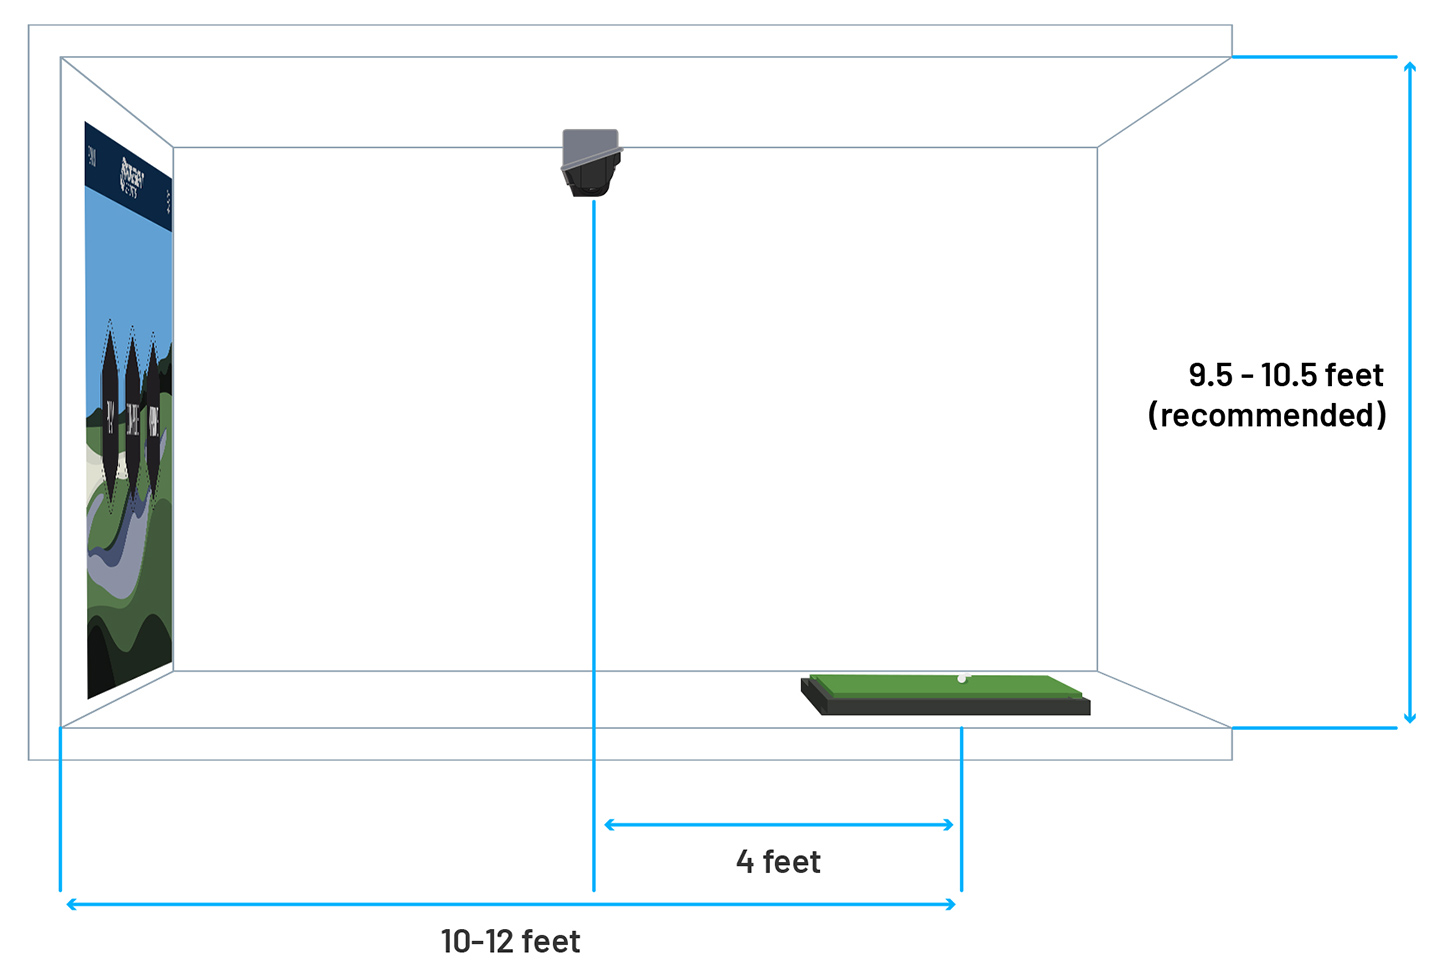
Please see the image below for instructions on the proper mounting placement of the GCHawk.
.png)
-
Connecting Data Supply
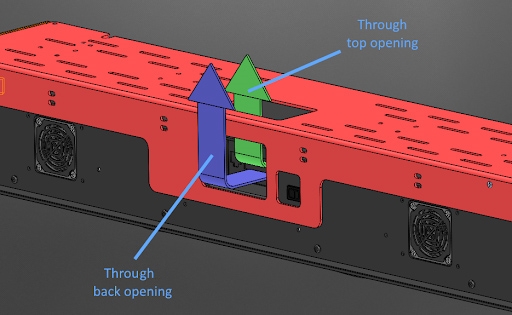
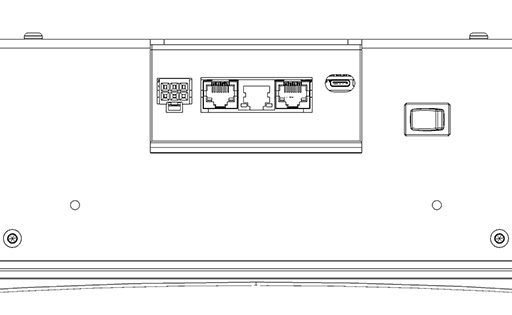
1) Run/secure the data (ethernet) cable from the location of the computer to the ceiling location where the GCHawk will be mounted. The cable will be connected in the center/back area of the unit (Pictured below).
Please Note: The GCHawk may receive the data (ethernet) cable from either the top or the back of the mount.
-
Connecting Power Supply
The Power Supply can be installed in the following three different configurations:
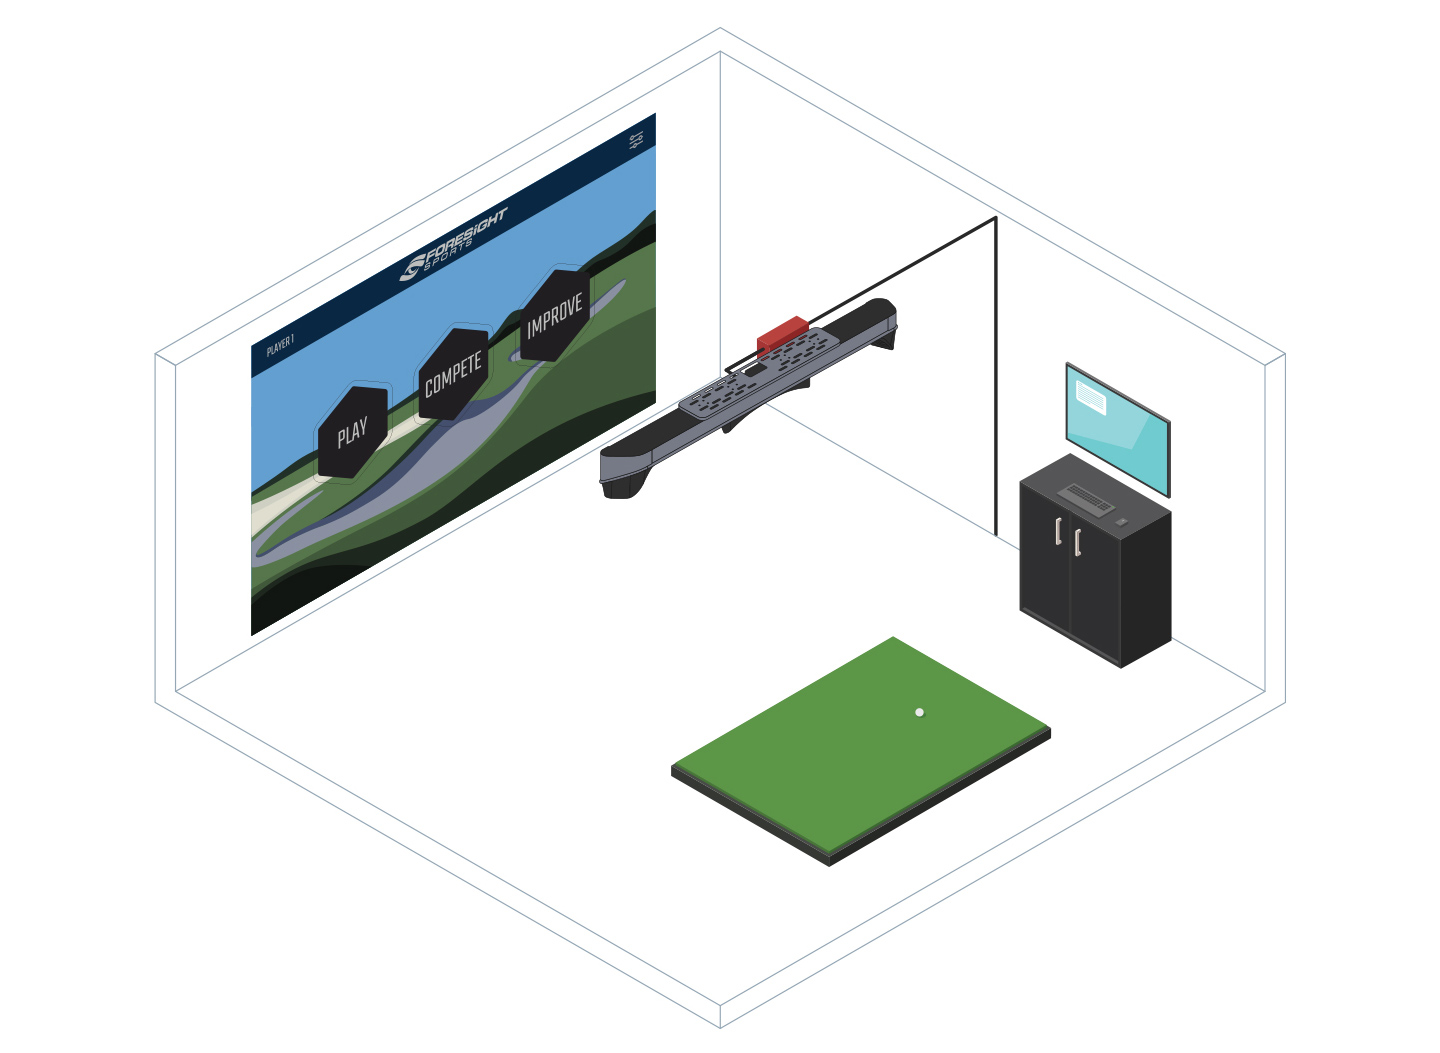
Configuration Option A) Attached to mount
1) Attach Power Supply Bracket to Ceiling Mount on the right or left side (DO NOT COVER FAN).
2) Locate power source and plug the wireless power remote receiver into a 3 conductor, GFCI protected outlet.
3) Plug the power supply into the wireless receiver outlet.
4) Run the power supply input cord from the power source to where the GCHawk will be mounted.
5) Install Ceiling Mount (Refer to Ceiling Mount Installation Section).
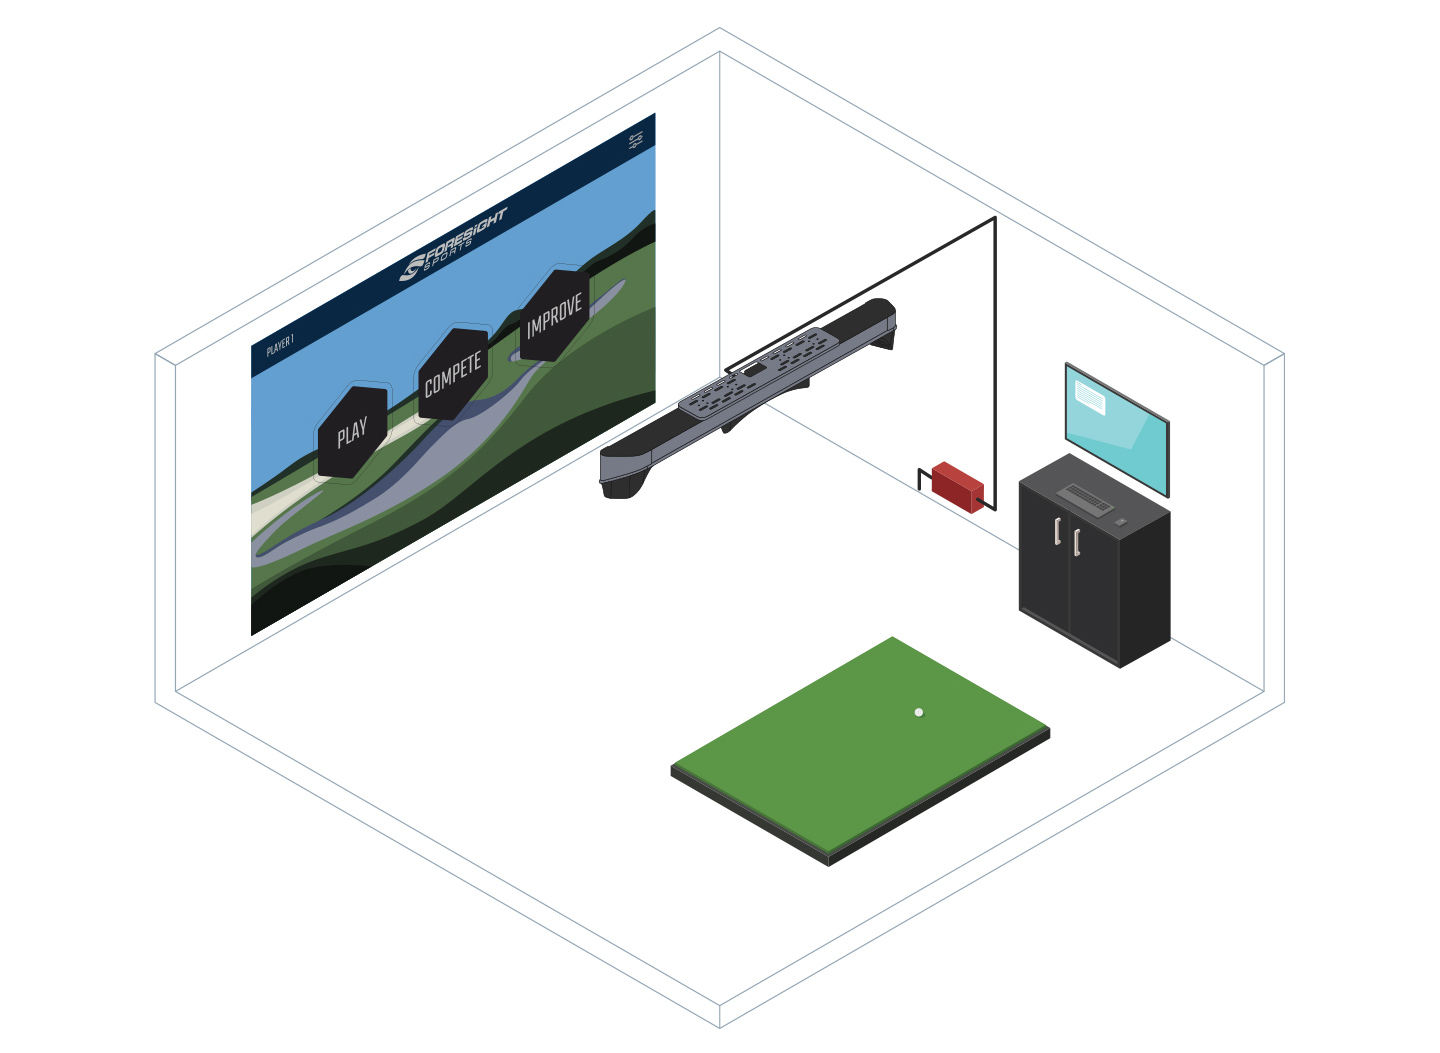
Configuration Option B) Remote (Requires separately purchased Cable Extension)
1) Locate Power Source and plug the receiver into a 3 conductor, GFCI protected outlet.
2) Plug the power supply into the wireless receiver outlet.
3) From the power source location, connect output cord of the power supply to the output extension (purchased separately).
4) Run the output extension to where the GCHawk will be located.
5) Install Ceiling Mount (Refer to Ceiling Mount Installation Section).
Configuration Option C) Above/Inside Ceiling
1) Locate and place the power supply block in the ceiling within 3 feet (1 meter) of the GCHawk mounting location.
TIP: Attach power supply bracket above ceiling as a holder for the power supply.
2) Locate the power source and plug the wireless power remote receiver into a 3 conductor, GFCI protected outlet.
3) Plug the power supply into the wireless receiver outlet.
4) Run the power supply input cord from the power source to where the power supply block will be located.
5) Install Ceiling Mount (Refer to Ceiling Mount Installation Section).
-
Installing Ceiling Mount
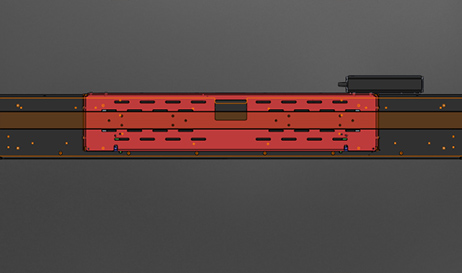
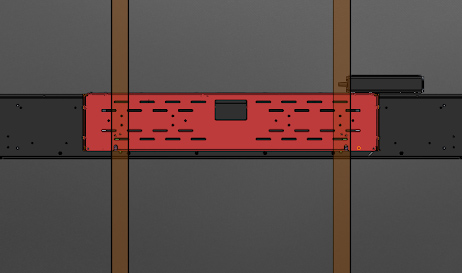
1) Locate Ceiling Joists or Rafters.
2) Use appropriate screws to support up to 200 lbs. Make sure screws can fit through the slots on the mount.
3) Screw the ceiling mount directly into ceiling joists or rafters. Must use a minimum of 4 screws.
-
Installing Sliding Plates To GCHawk
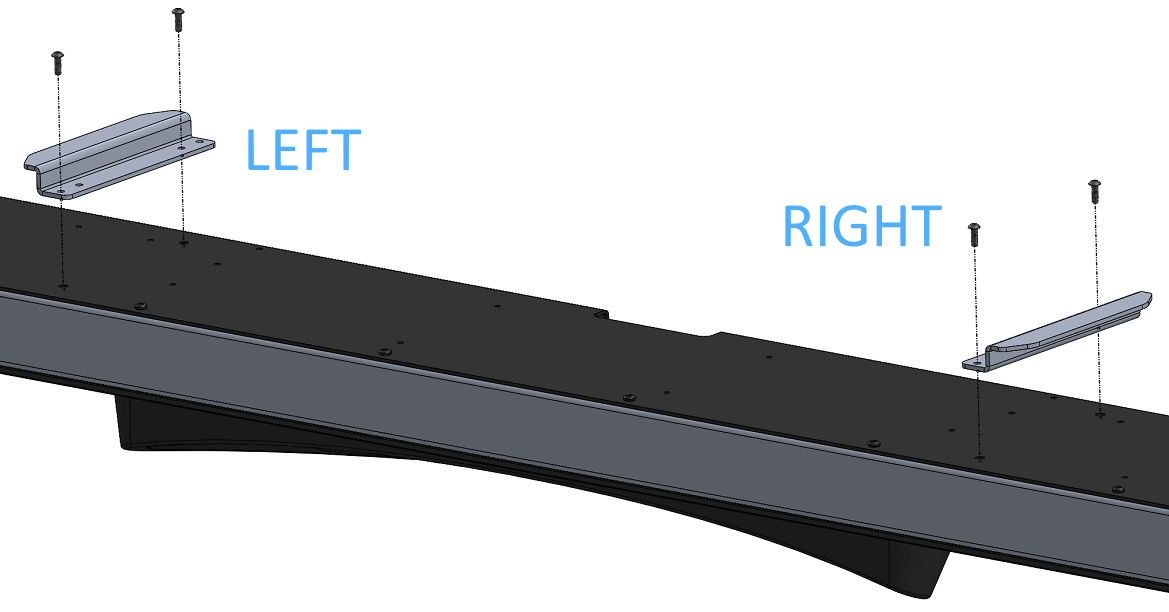
1) Using the screws provided in the accessory box, screw the ceiling mount sliding plates onto the GCHawk in the screw holes indicated below with the sliding plates folding away from the center
-
Mounting The GCHawk
This step must be performed by at least two licensed contractors.
1) Open latches on ceiling mount.
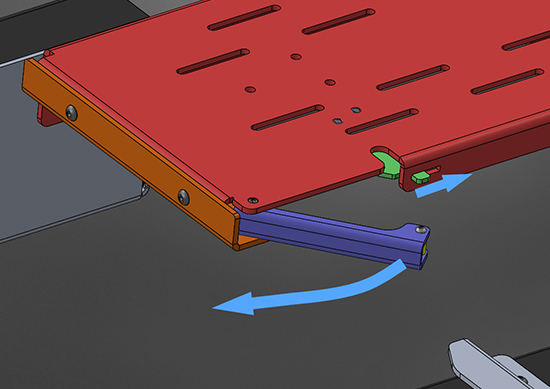
2) Slide the sliding plates attached the GCHawk into the ceiling mount.
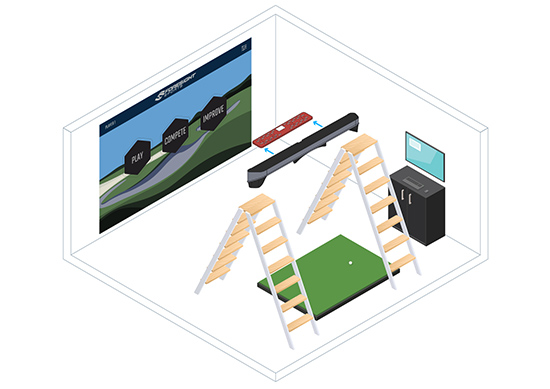
3) Close latches on the ceiling mount.
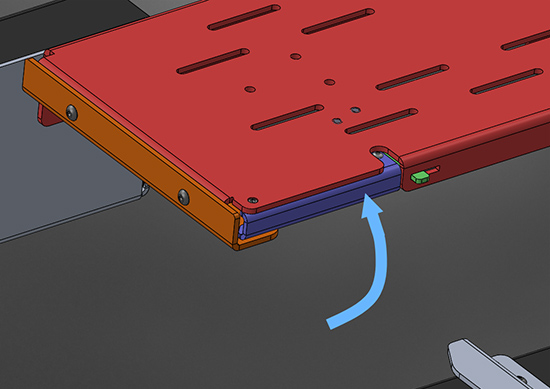
4) Remove protective film from the GCHawk.
-
Connecting power and data to the GCHawk
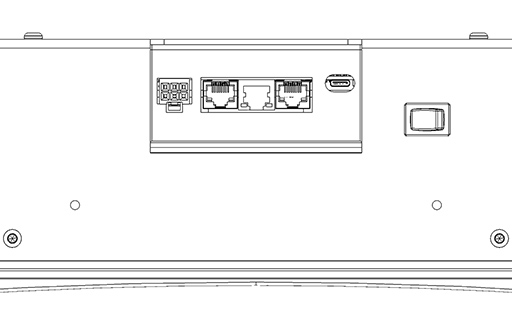
1) Connect the power cord to the GCHawk power port and the data line to its proper data connection port. See the image below as a reference.
USB-C connection will be used during calibration. If you are planning on calibrating the device after install, you should plug in the USB-C conncetion end of the cable to the GCHawk and let it hang down towards the ground. If possible, connect the other end to your PC.
-
-
Setup
-
Power On/Off and RESET
TO POWER ON:
1) Take the wireless power remote and remove the plastic battery tab from the battery compartment in the back of the remote control to activate the DC 12V Type A23 pre-installed battery. Next, press on the ON button on the remote control.
2) When the GCHawk is turned on, you should see a yellow light appear in the LED Indicator. This means the device is booting up. The LED indicator will start blinking blue once the boot up is complete.
TO POWER OFF:
1) To turn off the GCHawk, simply press the OFF button on the remote control. The LED light should turn off completely.
TO RESET:
1) To reset the GCHawk, turn off the device, wait 30 seconds, then turn it back on.
-
LED Indicator
Hawk State LED Color LED Behavior Booting up Yellow Steady
Looking for ball Blue Blinking Ready to hit Blue Steady Error Red Steady -
Calibration
1) Download the Foresight Sports Overhead Launch Monitor Calibration Tool:
-
Foresight Sports Overhead Launch Monitor Calibration Tool v3.2.1.1
Please see the GCHawk Guide - Setup:Calibration Section, to review the mounting and calibration process.
Release Date:
Please review the How-To: GCHawk Calibration Walk Through video below before attempting calibration.
If your GCHawk is not connected to a PC with internet, download the file on a PC with internet connection and transfer to the PC connected to the GCHawk; please make sure to read steps 6 and farther for final calibration instructions.
2) Double-click to install Foresight Sports Overhead Launch Monitor Calibration Tool.
3) Ensure the GCHawk is connected to your PC through Ethernet, and power on the GCHawk.
4) Launch the Foresight Sports Overhead Launch Monitor Calibration Tool and follow the instructions in the application.
5) When mapping the hitting area or room area, hold the wand with your arm down towards the ground and the tip of the wand no more than 6 inches from the ground, move the Calibration Wand slowly around the hitting zone like a metal detector.
If your GCHawk is connected to a PC with internet access, the application will send data to the cloud, where a server will perform the calibration computation required and send back to the GCHawk. The GCHawk will reset itself during the process once it receives the calibration file.
Once the GCHawk boots up, you should see a blue light appear on the GCHawk - your calibration is complete!
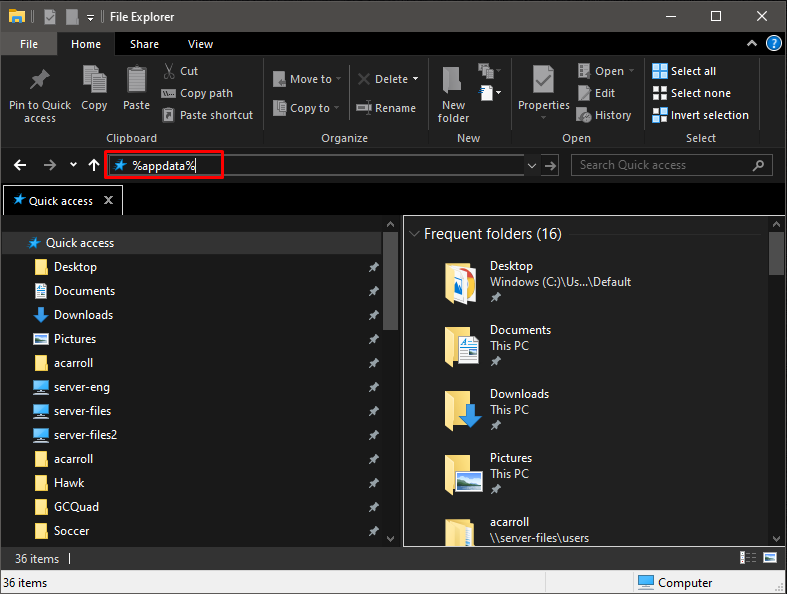
6) If your GCHawk is not connected to a PC with internet access, you must do this process manually. First open Windows File Explorer and type %appdata% in the address bar.
Then click on the AppData folder.
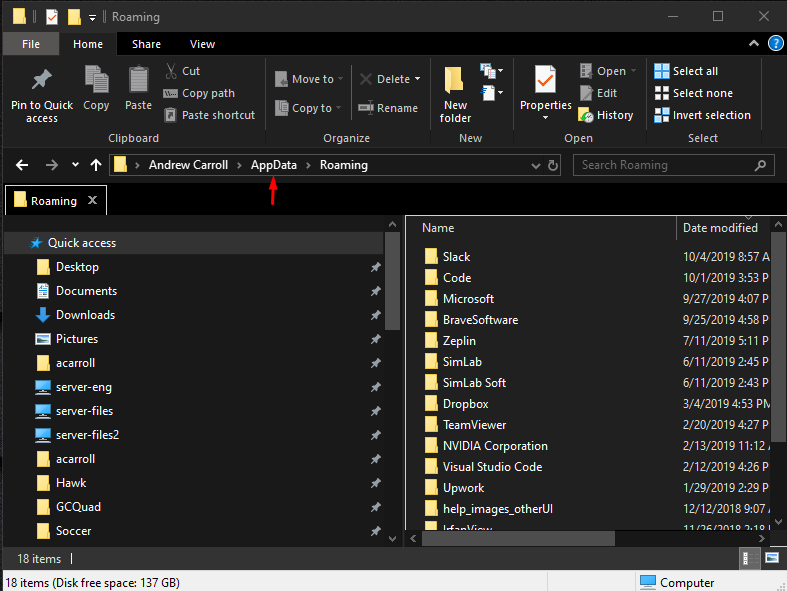
Then click go to *C:\Users\USERNAME\AppData\LocalLow\ForesightSports\ForesightOverheadCalibration
In this folder, Locate the file named WandSamplesXXXXX.json (XXXX is the Serial Number of the device you are trying to calibrate). Email this file to your support representative at Foresight Sports for processing. In this email, please include the serial number of your device (located on a stick attached to the back of your GCHawk).
7) Your Foresight Sports support representative will return a file named CAL_E.SNXXXXX.bin. The XXXXX will be different depending on the serial number of your GCHawk.
8) Connect a USB-C cable from the back or your GCHawk to a PC that has the CAL_E.SNXXXXX.bin on it.
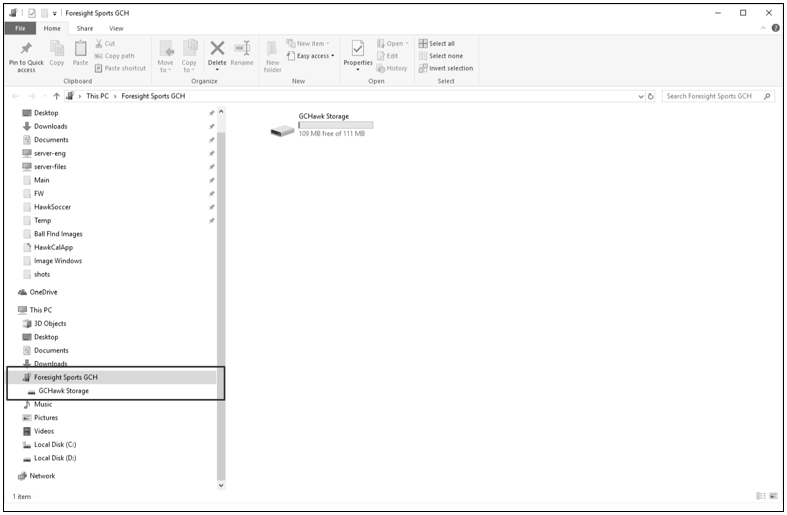
9) The GCHawk will act like a Thumb drive and should be visible in Windows File Explorer.
Select Foresight Sports GCH and open the GCHawk storage. See image below:10) Drag and drop the CAL_E.SN00000.bin into the GCHawk Storage.
11) Turn off the GCHawk, wait at least 5 seconds and then turn the it back on. Your GCHawk calibration process is complete!
-
-
-
Troubleshooting
-
GCHawk will not connect to software.
Is the GC Hawk connected correctly?
To check this, confirm the Ethernet or USB cable is properly connected to the GC Hawk and to your computer.
Tip: If using any extension cable, be sure that it is connected correctly and, if needed, is using a hub that it is powered.Is the GC Hawk recognized and connected within the Software?
Locate the devices option and confirm your device is connected. If needed reference the software user manual for guidance. -
GCHawk will not lock onto the ball.
Will your GC Hawk locate the ball in the hitting zone?
To confirm this, move the ball into the respective hitting zone and wait for the indicator light on the device to turn solid blue. If this is not happening the view of the ball may be obstructed or the hitting zone may not be identified correctly due to incorrect user calibration.
Tip: Attempt to move the ball from the left and right hitting zones to diagnose if there is any change. -
GCHawk will not power on.
Is the GC Hawk receiving power?
Reset all connections. Remove and then Plug Back in the power cable from the back of the GC Hawk, Check the Power Brick Connections (small blue light indicates power), and Check the connection to the wall outlet.Is your power remote active?
Be sure your remote has batteries and is operational. If this is in question remove the GC Hawk power cable from the wireless remote control outlet and plug the GC Hawk power cable directly to the wall outlet. -
Calibration app error report
If you have issues with GCHawk Calibration occurring please collect the log folder (all contents) and submit a support request for review.
-
Locate and Collect the contents of this folder - C:\Users\USERNAME\AppData\LocalLow\ForesightSports\ForesightOverheadCalibration (The entire contents).
-
Create a Support Request with the contents included. Create a support request here - Contact Technical Support
-
Add details or an image of the error message you are seeing on the app, or the step and process where the app stopped work.
-
Submit the Report to the Support Team for review
-
-

