FSX Play User Manual
-
Download and Installation
For information on downloading and installing FSX Play, please follow the FSX Play download and installation guide here.
-
Getting Started
Launching FSX Play
To begin, select the FSX Play icon from your desktop (pictured below) or the directory where this is installed. The default directory is: C:\ProgramFiles(x86)\FSXPlay
If this is their first launching FSX Play, users will be prompted to login with their FSX Live details and enter their activation code. For more information on locating these details, please follow the FSX Play download and installation guide here.
Transferring Your FSX 2020 Courses To FSX Play
Please Note: Your existing FSX 2020 course library will transfer to FSX Play if you log in with the same FSX Live details linked to your FSX 2020 account. These FSX Live details will be in your original FSX 2020 download email. If you are having issues locating your FSX Live details, please follow this guide.
-
Connecting A Device
With your Foresight Sports device turned on, click Search and connect to your device.
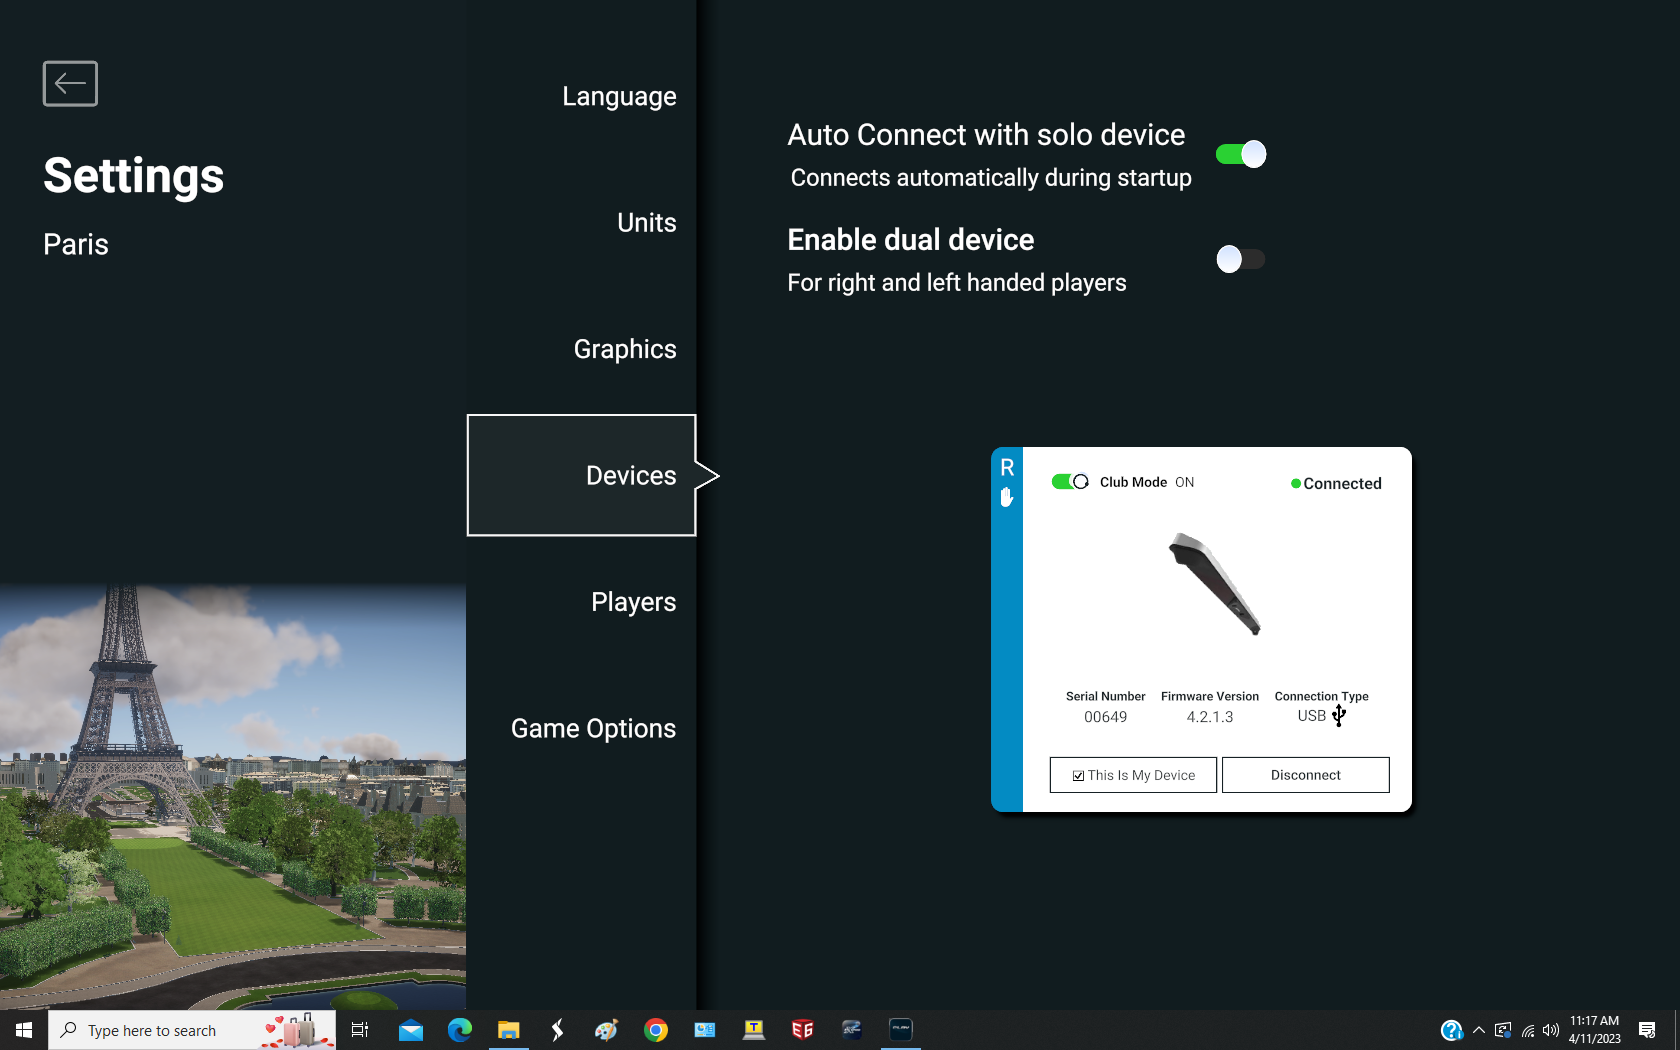
Users must connect their device to FSX Play to begin playing. At the main menu, please click the Player Dashboard icon (top right, circled) and connect a device under the Devices Tab. If a device is not connected, users will also be prompted to connect their device in-game.
Once a device is connected, users will see the following information:
.png)
If you have a GCHawk, and wish to Enable your purchased Club Feature Addon, you will do that at this stage as well:
-
Connecting A Swing Camera
*NOTICE: Only Supported in Software Version 1.10.0.10 & Newer.
To connect your Foresight Swing camera within your FSX PLAY software, follow the instructions below:
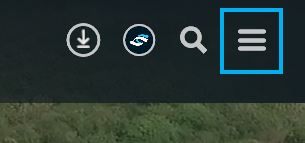
1. Open the FSX PLAY MENU window:
Then, select the SETTING Button
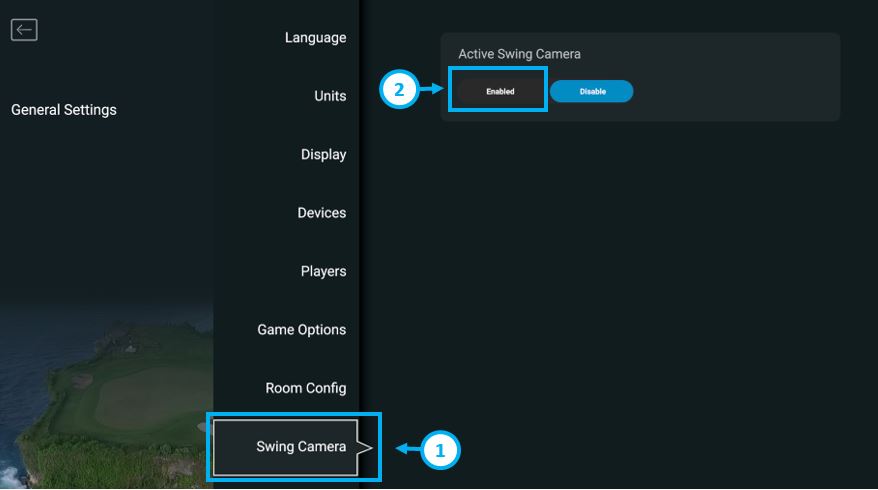
2. Select the SWING CAMERA option (1), then the ENABLE from the available options (2).
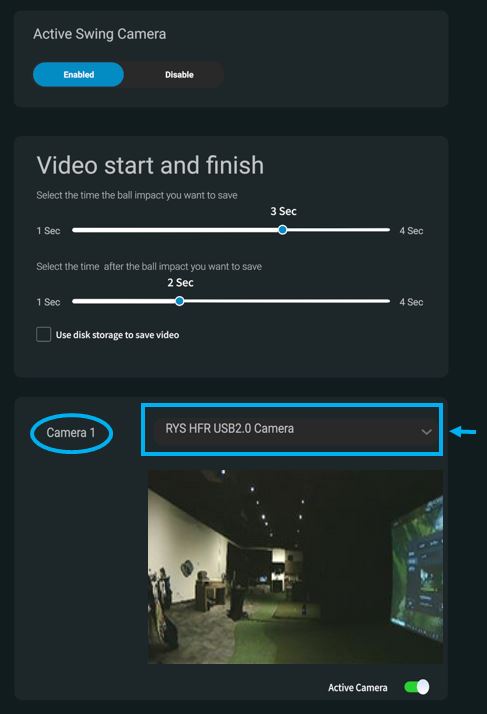
3. Identify the Camera Labeled Camera 1, then using the drop down, select the Camera you wish to be presented here.
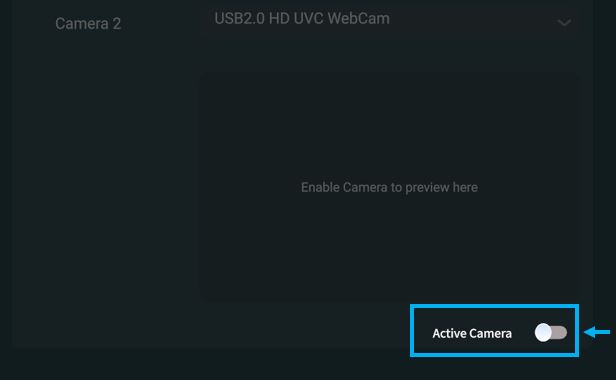
4. If you have more than one camera, you can select the cameras assigned to those position here. You may be prompted to ACTIVATE CAMERA if you camera is disabled from within the software, as shown here:
Your Swing Cameras will now display within your Software from the Data Analysis Screen on the VIDEO TAB. This is triggered by ball impact with your Launch Monitor.
1. Select the ANALYSIS Button:
2. Select the VIDEO Tab:
-
-
Starting A New Game
Users can choose from three options at the main menu:
Courses: Play a round of golf on a chosen course.
Practice: Begin a practice session on a driving range or chosen course.
Games: Take part in a long drive or closest to the pin competition.
-
Courses
Selecting A Course
The courses screen allows users to choose a course and begin a round.
Users will see their recently played courses, current library and can purchase additional courses. Additionally, users can also create a list of their favorite courses by selecting the Favorite Icon (pictured below).
To begin a round, hover over the desired course. Users can begin a round with default settings by clicking the Play Icon. This will bring users to the pre-round setup menu.
Note: Users must download and activate their courses before they are available to use in FSX Play. For information on downloading and activating courses, see here.
-
Purchasing A Course
Users can purchase additional courses in FSX Play by scrolling to the On Sale icon and clicking Buy. This will bring users to the Foresight Sports online store.
-
Add Players
Users will automatically be brought to the add players screen.
Add or de-select players to the session by selecting the + icon or clicking on an existing player and selecting remove.
Set the tee box, handedness, add a handicap and login to FSX Live for each individual player in their session.
Choose the tee information icon (top right) to see the scorecard information for the chosen course.
The favorites icon allows users to 'favorite' a profile, saving it to FSX Play for re-use in future sessions.
-
Setup
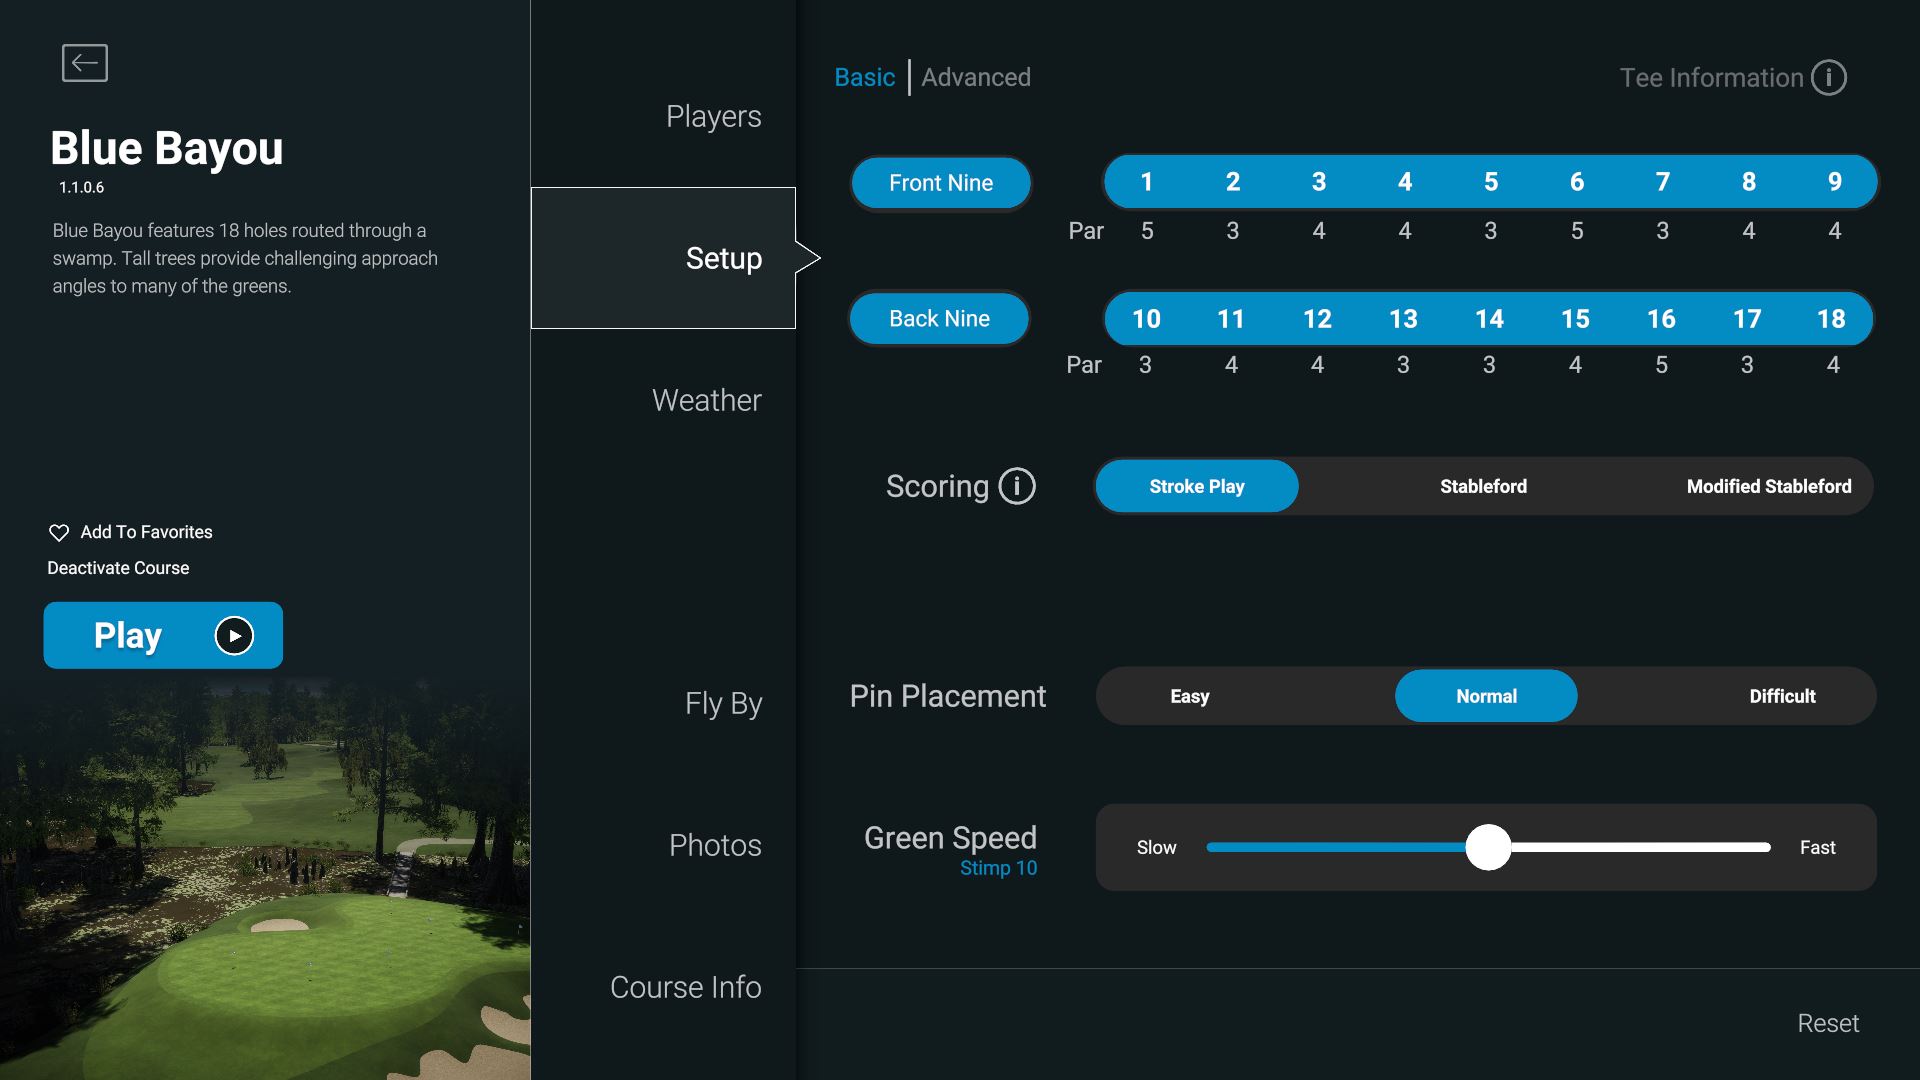
At the basic setup screen, users can configure their basic round settings. Users can enter advanced setup by clicking the Advanced icon.
Basic Setup Tab
Holes - Choose desired holes to play. Users can select/de-select holes by clicking on the hole number. 18 holes are selected by default.
Scoring - Choose your scoring type from the following:
1). Stroke Play - Standard golf scoring. The player’s score is determined by the cumulative strokes taken throughout the round.
2). Stableford - Point-based scoring system based on a player’s score on every hole. Lower scores equal more points.
3). Modified Stableford - Modified Stableford features higher penalties for poor shots and greater rewards for good shots.
Green Speed - Choose your green speed.
Advanced Setup Tab
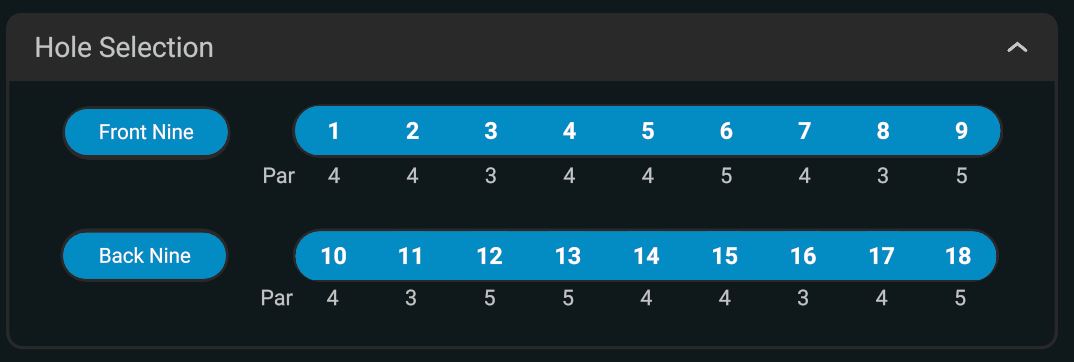
HOLE SELECTION:
- Front Nine - Displays the Par of Each Hole, as well as the option to select of remove specific holes from play as desired. Select the FRONT NINE button to select or deselect all holes.
- Back Nine - Displays the Par of Each Hole, as well as the option to select of remove specific holes from play as desired. Select the BACK NINE button to select or deselect all holes.
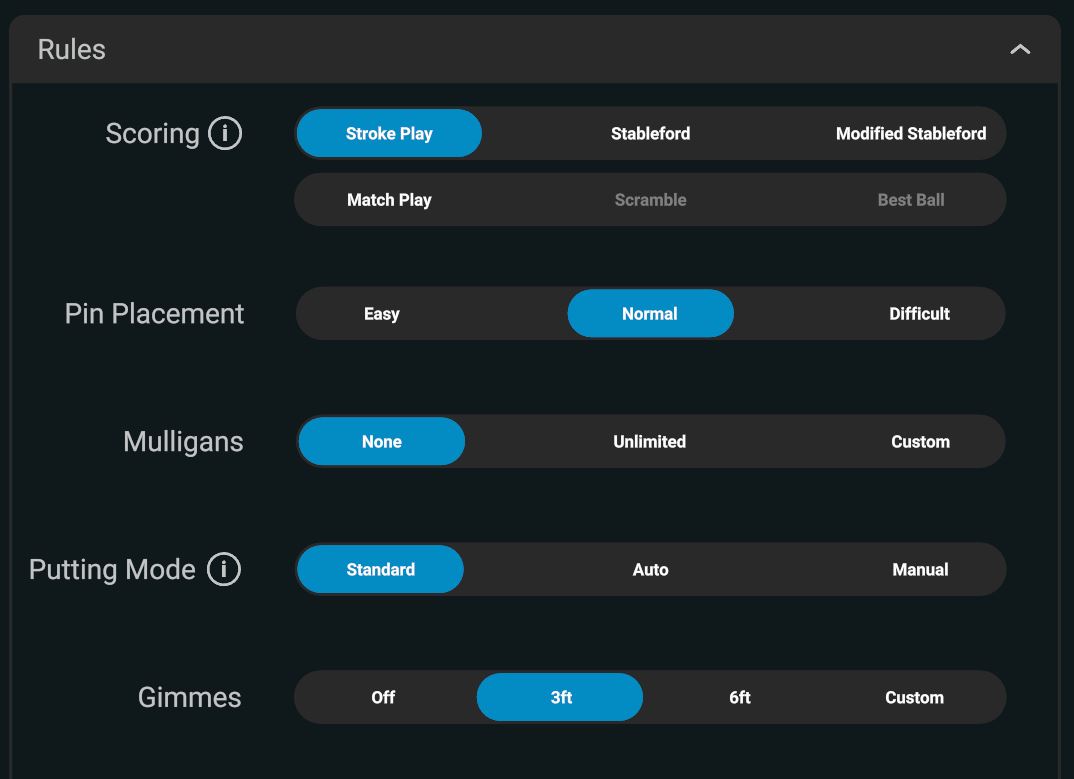
RULES - Edit your session rules. Choose from the following:
- Pin Placement - Adjusts the difficulty of the pin on the green.
- Mulligans - Select the number of mulligans allowed per hole.
- Putting Mode - Players can toggle between putting modes in the Play feature in the pre-game menu. Click the “?” symbol during pre-game setup to see the score table for Fast and Auto Putt. The putting modes are as follows:
- Auto Putt - Pre-select the amount of putts a player takes once the ball is on the green.
- Fast Putting - Player will be allowed one putt when on the green. If the putt is not holed, a tenth of a stroke is added for every foot remaining from the hole.
- Manual Putting - Manually enter the amount of putts taken once a player’s ball is on the green.
- Gimmes - Select a gimme distance for the round. Once a ball is inside the gimme distance, the player is given one stroke and the ball is considered holed.
- Practice - When enabled, a player can enter practice mode at any time during the round. A player is able to practice the current shot without penalty to their score.
- Stroke Limit - When enabled, a hole will end when a player's stroke count reaches double par.
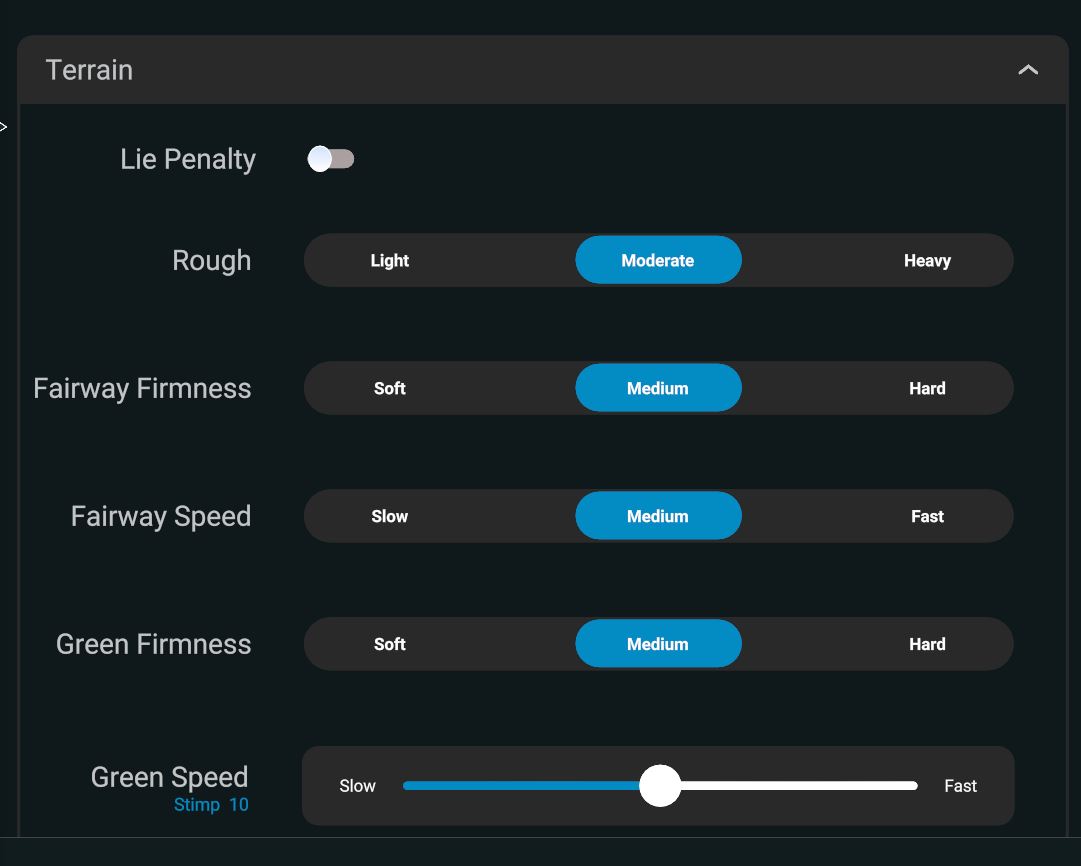
TERRAIN - Edit rough, fairway and green speeds/firmness. Users can also toggle the lie penalty for shots that land in the rough or bunkers.
-
Lie Penalty - Adjust Lie Penalty for bunker and rough to ON or OFF
-
Rough - Set to Light, Moderate, or Heavy to impact the stopping power of the rough.
-
Fairway Firmness - Set to Soft, Medium, or Hard to impact the bounce the ball receives when landing on the fairway.
-
Fairway Speed - Set to Slow, Medium, or Fast to impact the speed the ball travels when on the fairway
-
Green Firmness - Set to Soft, Medium, or Hard to impact the bounce the ball receives when landing on the green.
-
Green Speed - This displays the Stimp Measurement. Defaulted to a Stimp of 10 when set in the MIDDLE of the slider. Adjusting the slider will decrease or increase the Stimp from 5 to 15
-
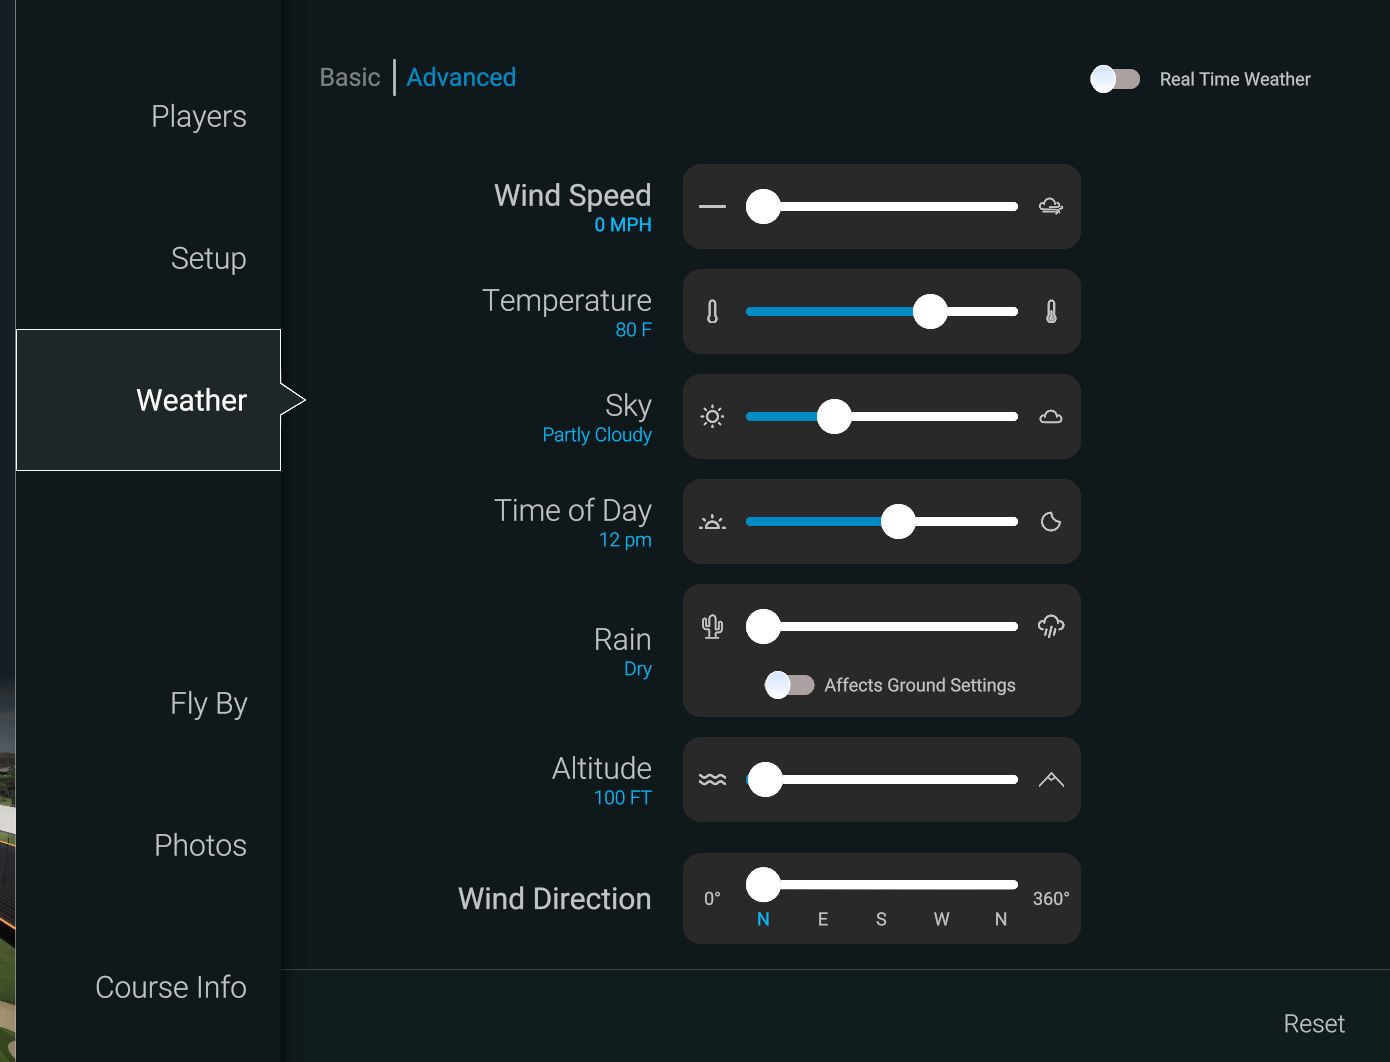
Edit Weather & Location Settings
Basic - Edit default wind and altitude settings.
- Wind: None, Light Wind, Moderate Wind, Heavy Wind
- Altitude:
- Your Altitude: Utilizes the Device Barometer if using a GCQuad, GCHawk, GC3, or Bushnell Launch Pro - GC2 device is preset to sea-level
- Sea Level
- Course Level: The preset course elevation, accurate to the exact course altitude when playing onsite.
Advanced - Edit wind speed in MPH, wind direction, temperature in degrees, Altitude (Elevation) in feet, fog level and time of day.
-
Beginning A Round
To begin a round, select the Play icon on the left hand side of the screen.
-
In-Game
Courses Interface
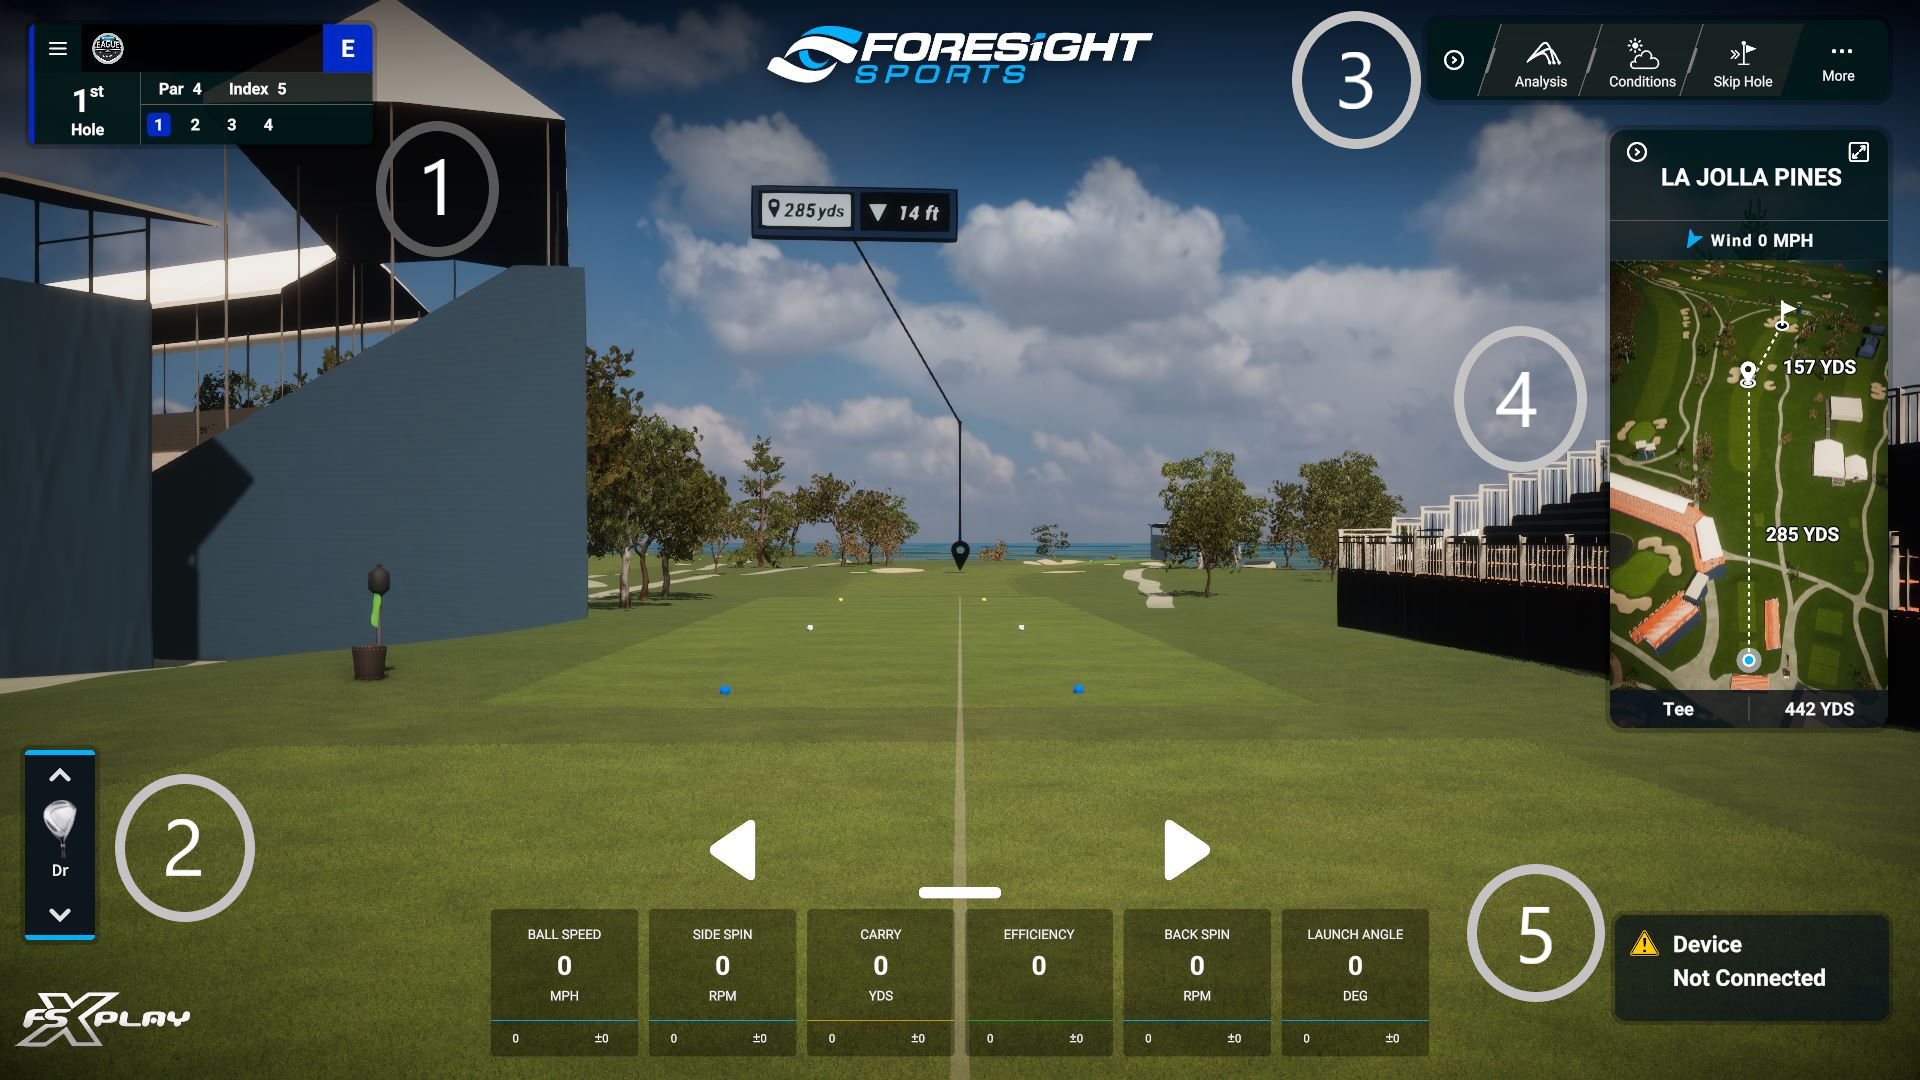
To begin your round, connect your device (A prompt will appear on round start if it is not already connected). Place your ball in the hitting zone. The ready message (bottom right) will indicate you are ready to play.
1. Hole Information - See the current player, hole number, shot number, index and score. Select the hamburger icon to edit settings and exit the game.
2. Club Selection - Toggle the arrows up and down to select the user's current club. Click the club icon, select a club and choose edit to change club distance and loft. By adding a distance, FSX Play will automatically recommend you a club based on your distance to the pin.
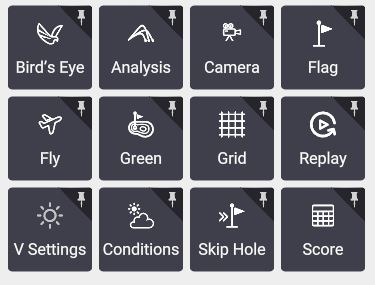
3. Shortcuts Bar - Choose from the available shortcuts. Click more to add or de-select shortcuts shown in the shortcuts bar. Click the arrow icon to hide the Shortcuts Bar. A list of the shortcut descriptions is included below.
4. Hovering the mouse over the Mini-Map will display both the distance to the ball and to the pin from that location. A player’s aim can be adjusted by clicking anywhere on the Mini Map. Click the arrow icon to hide the Mini-Map.
5. Ball Lock Indicator - Click this to connect a device. The indicator will show 'Ready' when users can begin hitting.
-
Shortcuts
Adjusting your desired shortcuts bar items is very easy.
The entire list will appear:
Selecting a shortcut:
Once an item is selected, it will appear with the PIN icon in blue. This will indicate it is one of the shortcuts in your shortcuts toolbar. When the PIN is gray, it is not present in your Shortcuts Toolbar, but can still be selected by clicking on the middle of the icon to open the desired screen, or perform the desired function:
FULL SHORTCUT DESCRIPTIONS
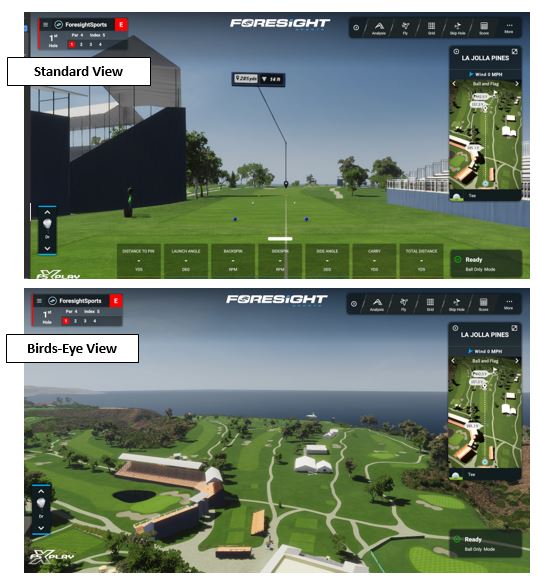
- Bird’s Eye: Gives an aerial view of the entire hole
.
- Analysis: View the data analysis screens for the current player.
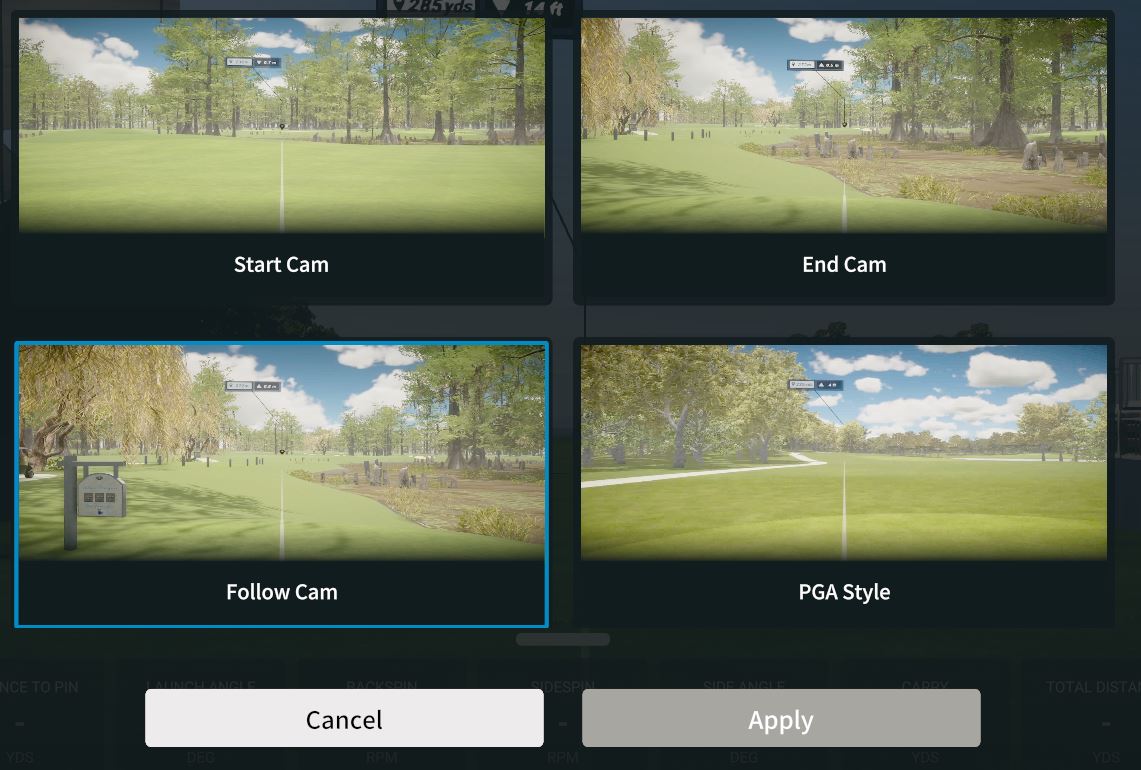
- Camera: Change the in-flight camera view. Select the Camera View and Select APPLY to finalize your selection. Hover over the camera view option to preview the camera view type.
- Flag: This brings the Flag back to the tee box, to review the Hole Location.
- Conditions: Edit conditions.
- Fly: Gives a flyby of the current hole.
- Green: Shows the green contours of the current hole using a green grid.
- Grid: Toggle the green grid on and off.
- Replay: View any previously hit shot for the selected player.
- Skip Hole: Move to the next hole. Players will be given a score of 9
- for the hole that was skipped.
- Score: View the scorecard for the round.
- V Settings: Change your screen display settings.
- Mulligan: Retake the previous shot without penalty (only applicable if mulligans were enabled during round set-up).
-
-
Practice
Players can begin practicing by selecting the Practice icon from the main menu. This will take them to the course selection screen. Players can begin a game by clicking the Play icon or they can change their settings by selecting settings & more.
-
Practice Interface
Setup
To begin, connect your device and select a club by toggling or clicking the club icon. Players may drop the golf ball anywhere on the golf course or driving range by hovering the mouse over the Mini Map and right-clicking.
-
-
Games
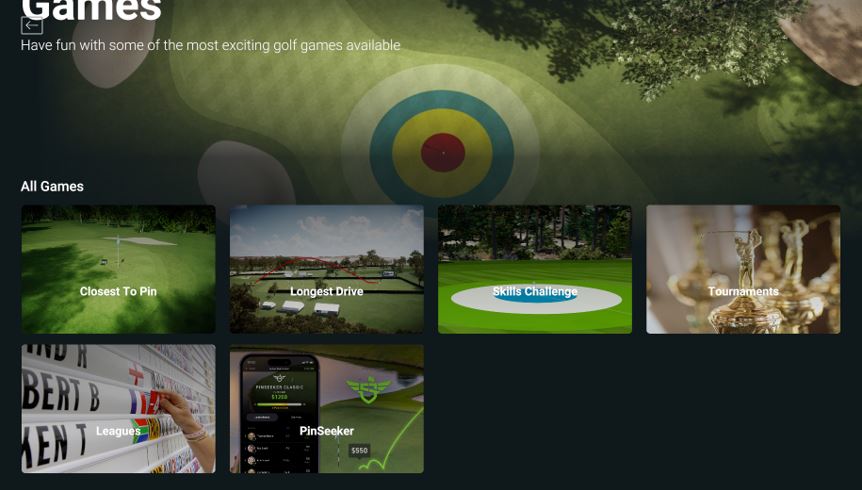
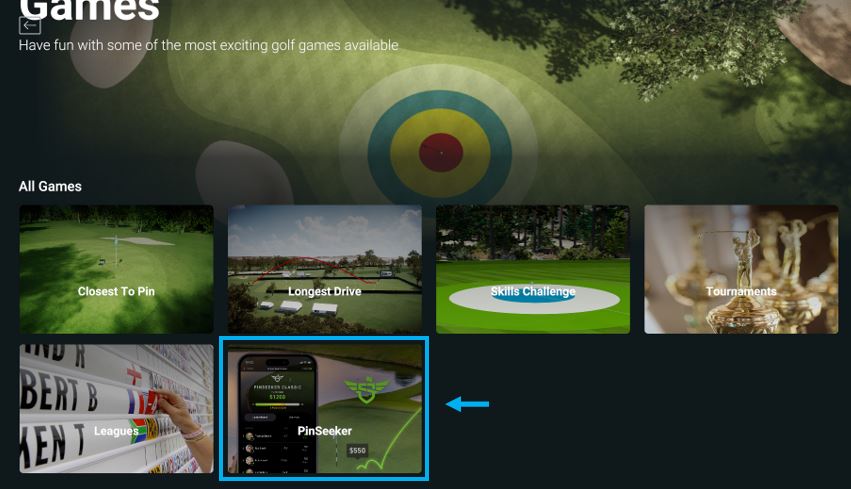
Click the Games icon to choose between a Closest To The Pin Contest, a Long Drive Competition, Skills Challenge, Tournaments, Leagues, or Pinseeker.
-
Joining Leagues
Leagues
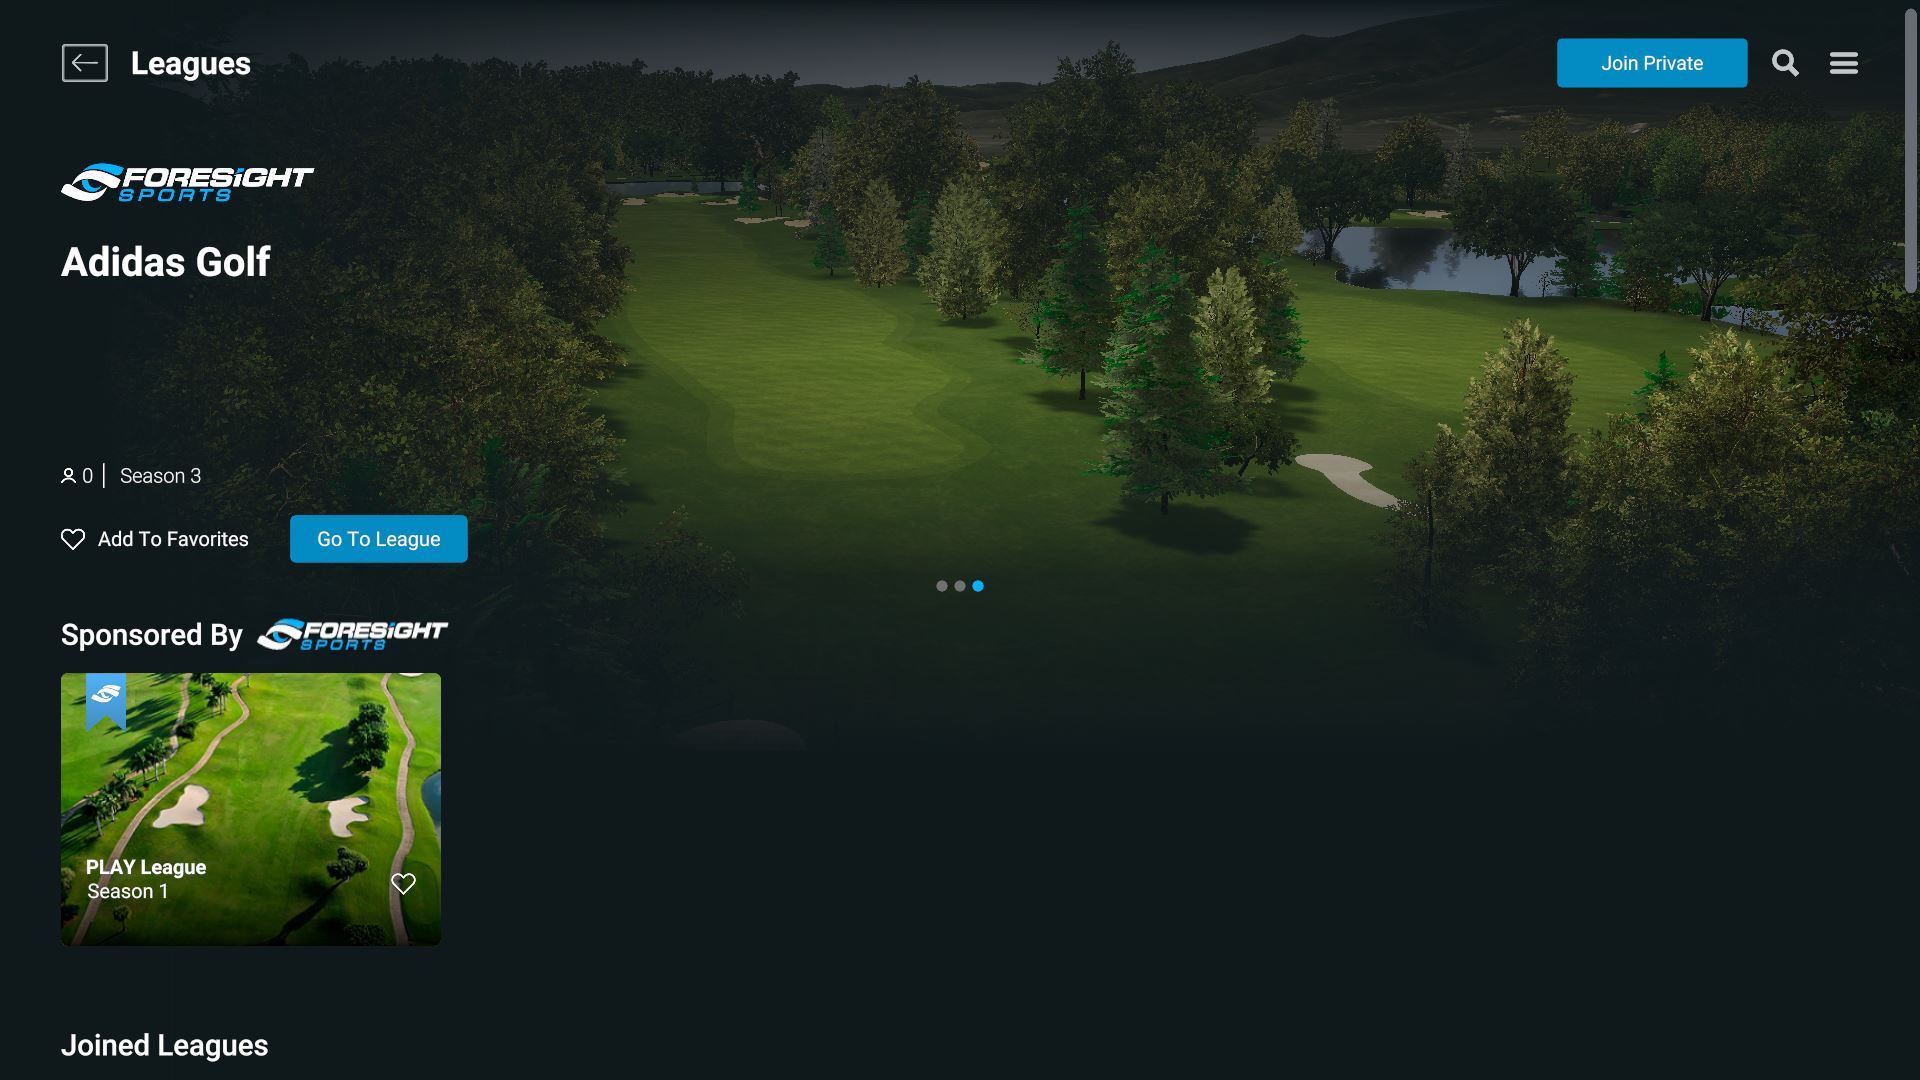
Online leagues are now available in FSX Play. Users should be signed into their FSX Live account to access league play. If users cannot remember their login details, they can recover their FSX Live account details here by clicking 'sign in' and 'forgotten password'.
Users should select the league they wish to join. They can also join a private league by selecting the 'join private' icon top right. Users will then be prompted to enter their league code.
JOINING FSX PRIVATE LEAGUE IN FSX PLAY
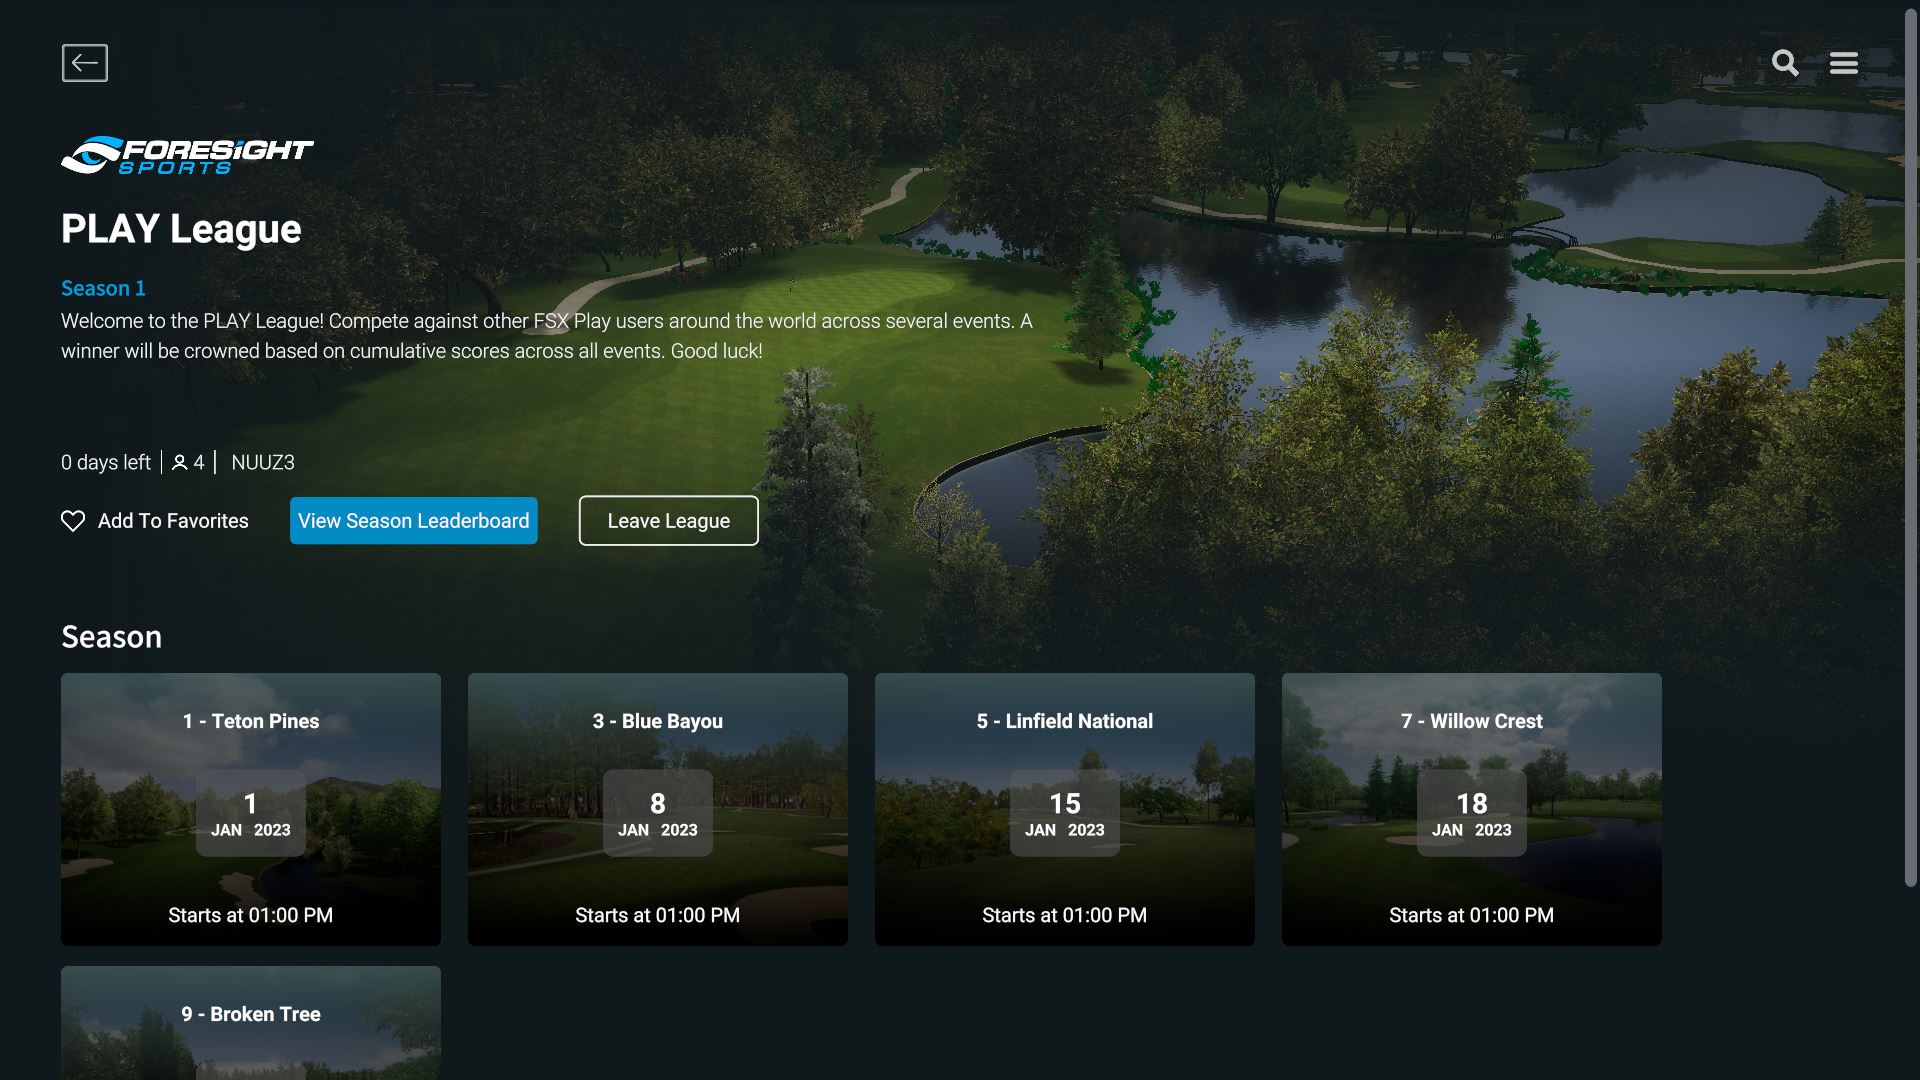
Within the joined league's menu, users can view the season leaderboard and leave the league.
-
Custom Leagues
Creating Custom Leagues
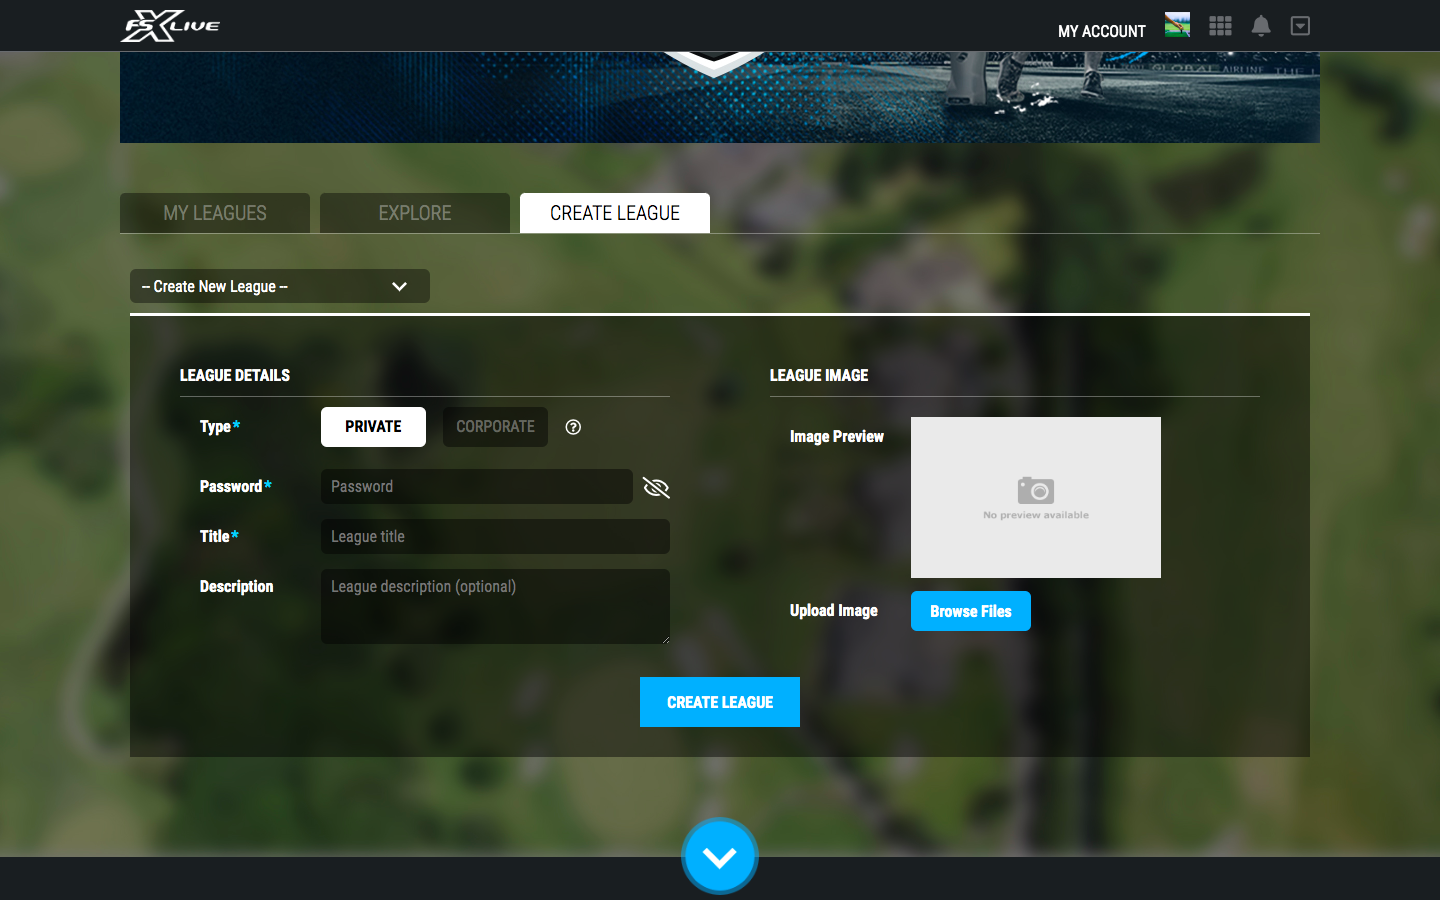
Users can create their own custom private and corporate leagues by logging into their FSX Live account here.
CREATING A FSX PRIVATE LEAGUE IN FSX LIVE
ENTERING FSX LEAGUES IN FSX LIVE
From the homepage users should select the Leagues tab (pictured).
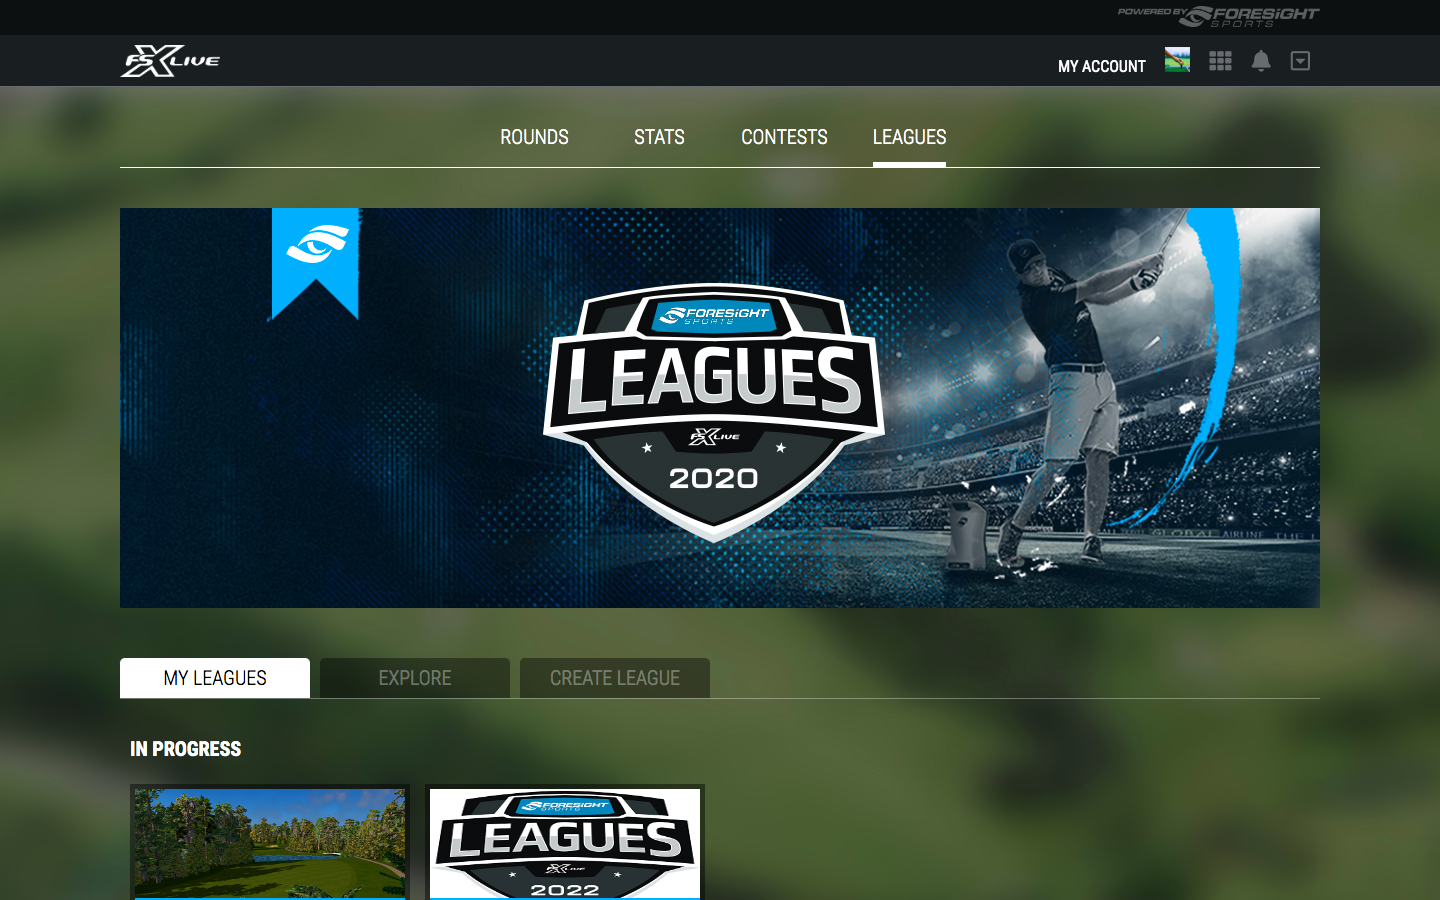
Users can see their existing leagues in the My Leagues tab and find new leagues to join by selecting the Explore tab. Select the Create League tab to begin new league creation.
-
Pinseeker Integration
Pinseeker Integration allows FSX PLAY users to access the PINSEEKER CLOSEST TO THE PIN competitions. Here you can enter to join existing competitions and compete for prizes.
For more information about Pinseeker Games, please see their Official Page: PINSEEKER
-
-
Settings
Edit settings by selecting the Settings icon from the main menu (top right).
Language - Select your language.
Units - Select your in-game display units.
Graphics - Change from windowed to fullscreen, resolution and display.
Devices - Connect/disconnect a device.
Players - Add/edit in-game player profiles.
On-Screen Data - Select and toggle the following options:
1). Tracers - Set tracers to on/off or last shot only.
2). On-Screen Ball Find - Ball find displayed on the user's device screen will also display on-screen in FSX Play. Note: This option is important when using devices that do not have a screen.
3). On-Screen Aiming - When enabled, allows the user to adjust aiming by pressing the arrows in-game.
4). Show Aim Line - Toggle to hide or display the aiming line.
5). Enable Aiming Pole - When enabled, a pole is visible in-game to assist with aim.
6). Wait For Spin - FSX Play will wait until spin is calculated and received from the device before showing the shot. If wait for spin is disabled, FSX Play will show the shot immediately and adjust the shot shape once spin is received.
7). Show Gimme Zone - Reveals a gimme zone around the hole.
8). Use New Practice Ribbon - Toggles data tile overlay within the software.

