Focus System - Advanced Setup
-
Camera Exposure Settings
If you adjust the camera and projector before starting the calibration, it will allow for a smoother calibration process once you start the calibration.
NOTICE:
- Before setting up, ensure the camera's USB cable is plugged into the USB port on the PC and FOCUS power cord is plugged into an outlet.
- Before setting up, ensure the projector cable is plugged into the PC.
1. Click the FOCUS icon on the Desktop to Launch the Focus Application:

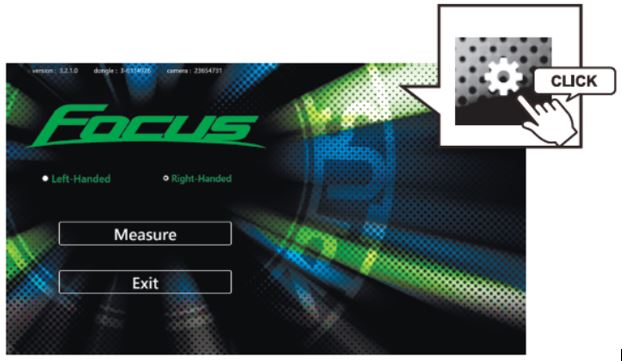
2. Click the SETTINGS Icon in the upper right corner of the HOME screen:
3. A password window will appear, type "focus" (All Lowercase). After typing "Focus", click NEXT.
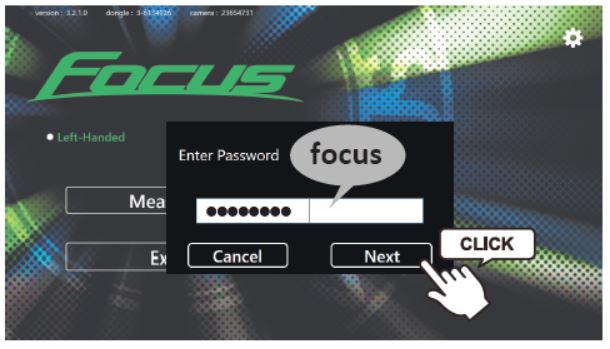
NOTICE: You can also reset the password in the Application Settings.
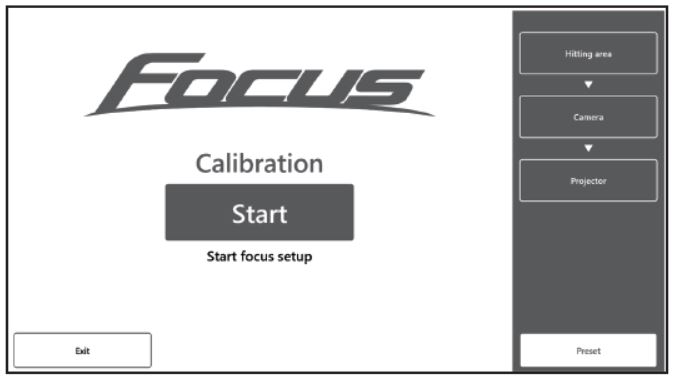
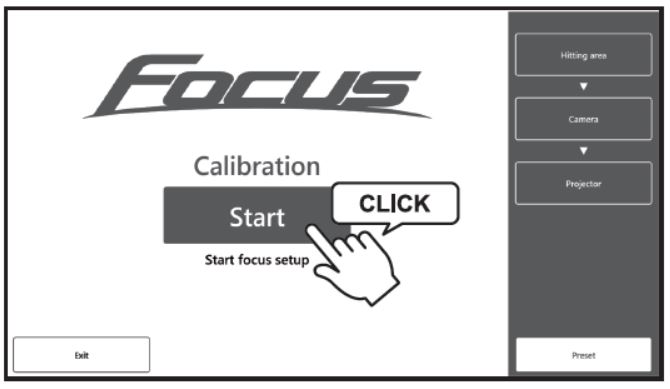
4. Click the "START" Button:
5. Select "Left-Handed" or "Right- Handed" mode:
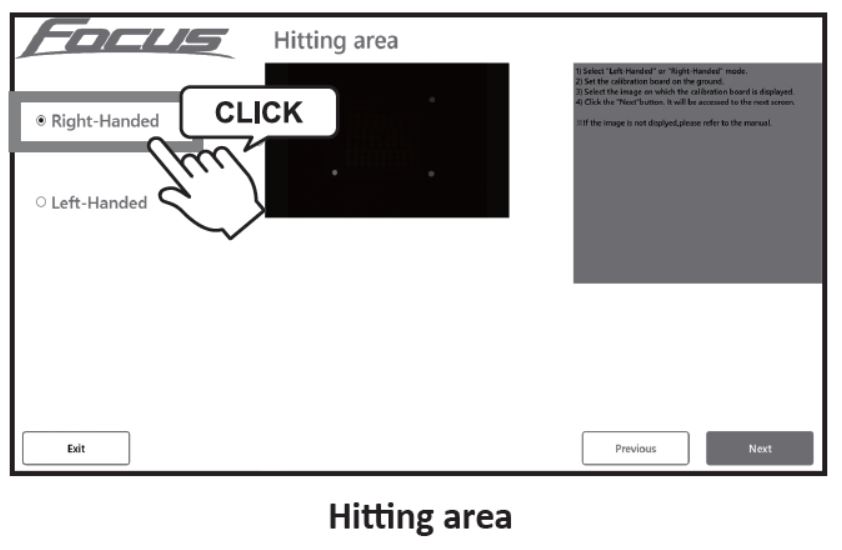
NOTICE: Multi-Handedness Not Supported On 1 FOCUS System. User Must Determine Single Handedness Prior To Setup & Calibration.
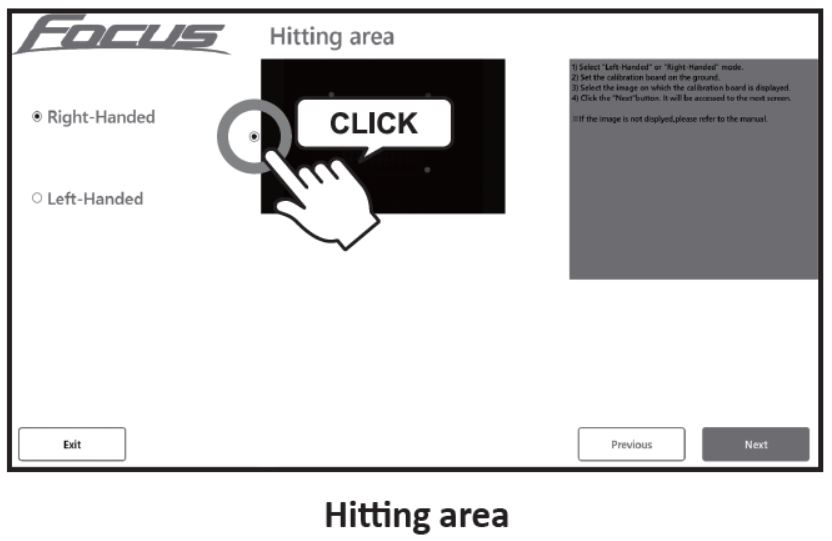
6. Select the Image representing the area to Calibrate:
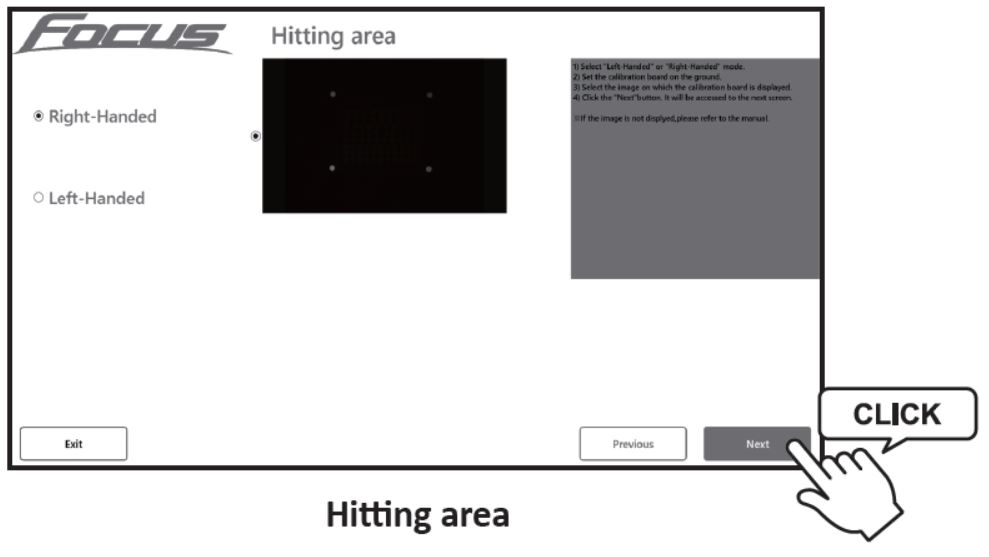
7. Click the "NEXT" button to proceed with the Calibration:
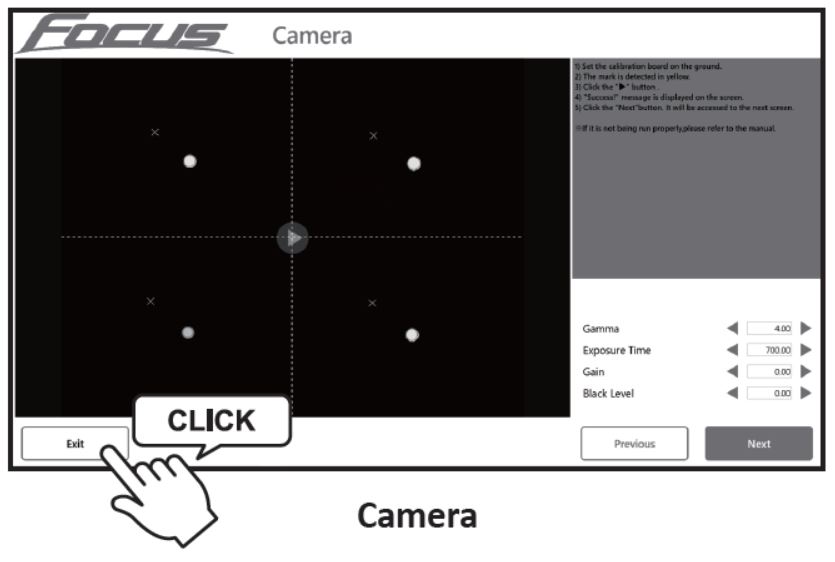
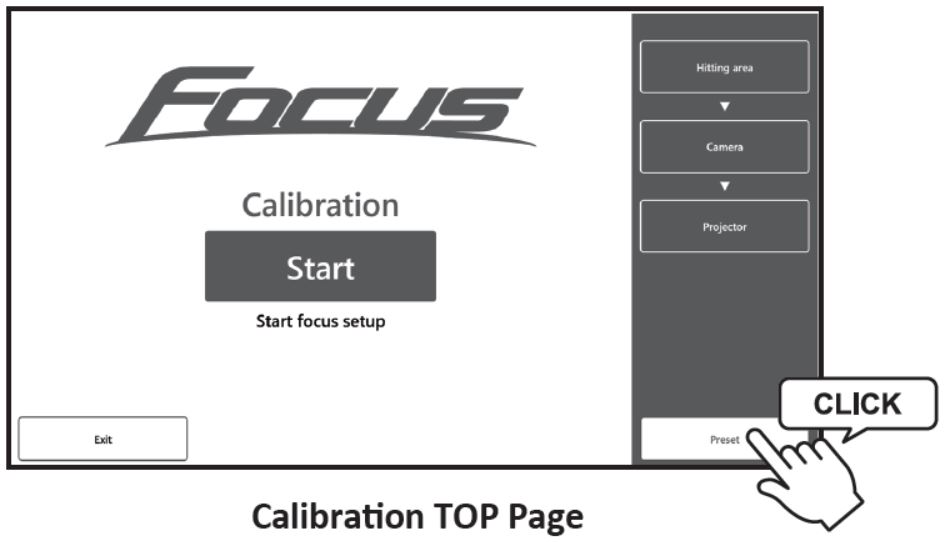
8. Click the "EXIT" button on the next page to return to the TOP MENU of the Calibration:
You may adjust the following camera exposure settings:
- Gamma
- Exposure Time (Which Will Impact Brightness As The Camera Stay Open Longer)
- Gain
- Black Level
9. Click the "Preset" button:
-
Focus Adjustment
-
Preparing Focus Adjustments
Click the "FOCUS ADJUSTMENT" button to adjust the focus of the camera.
NOTICE: This part refers to adjusting the focus of the FOCUS System Camera, not the focus of the Projector.
SETUP PREPARATION 1:
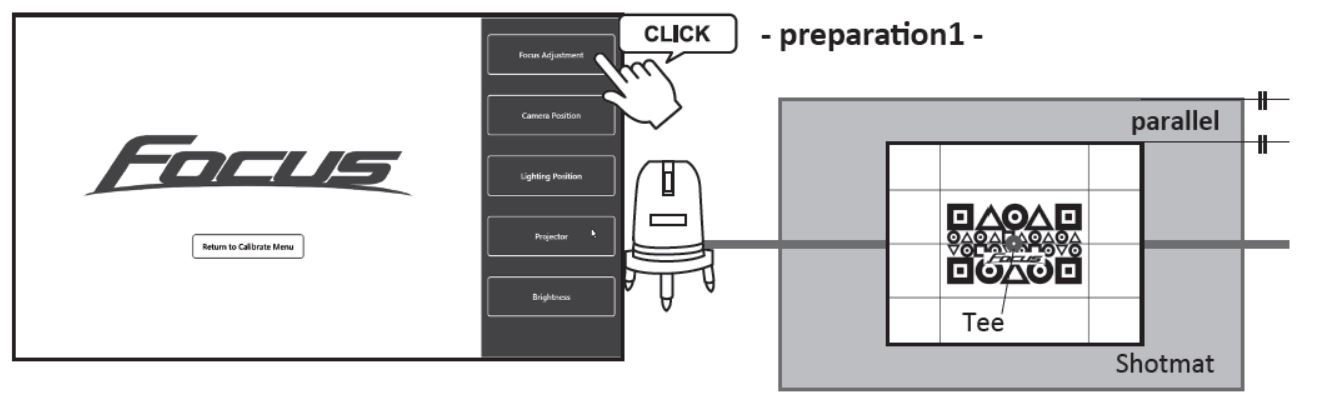
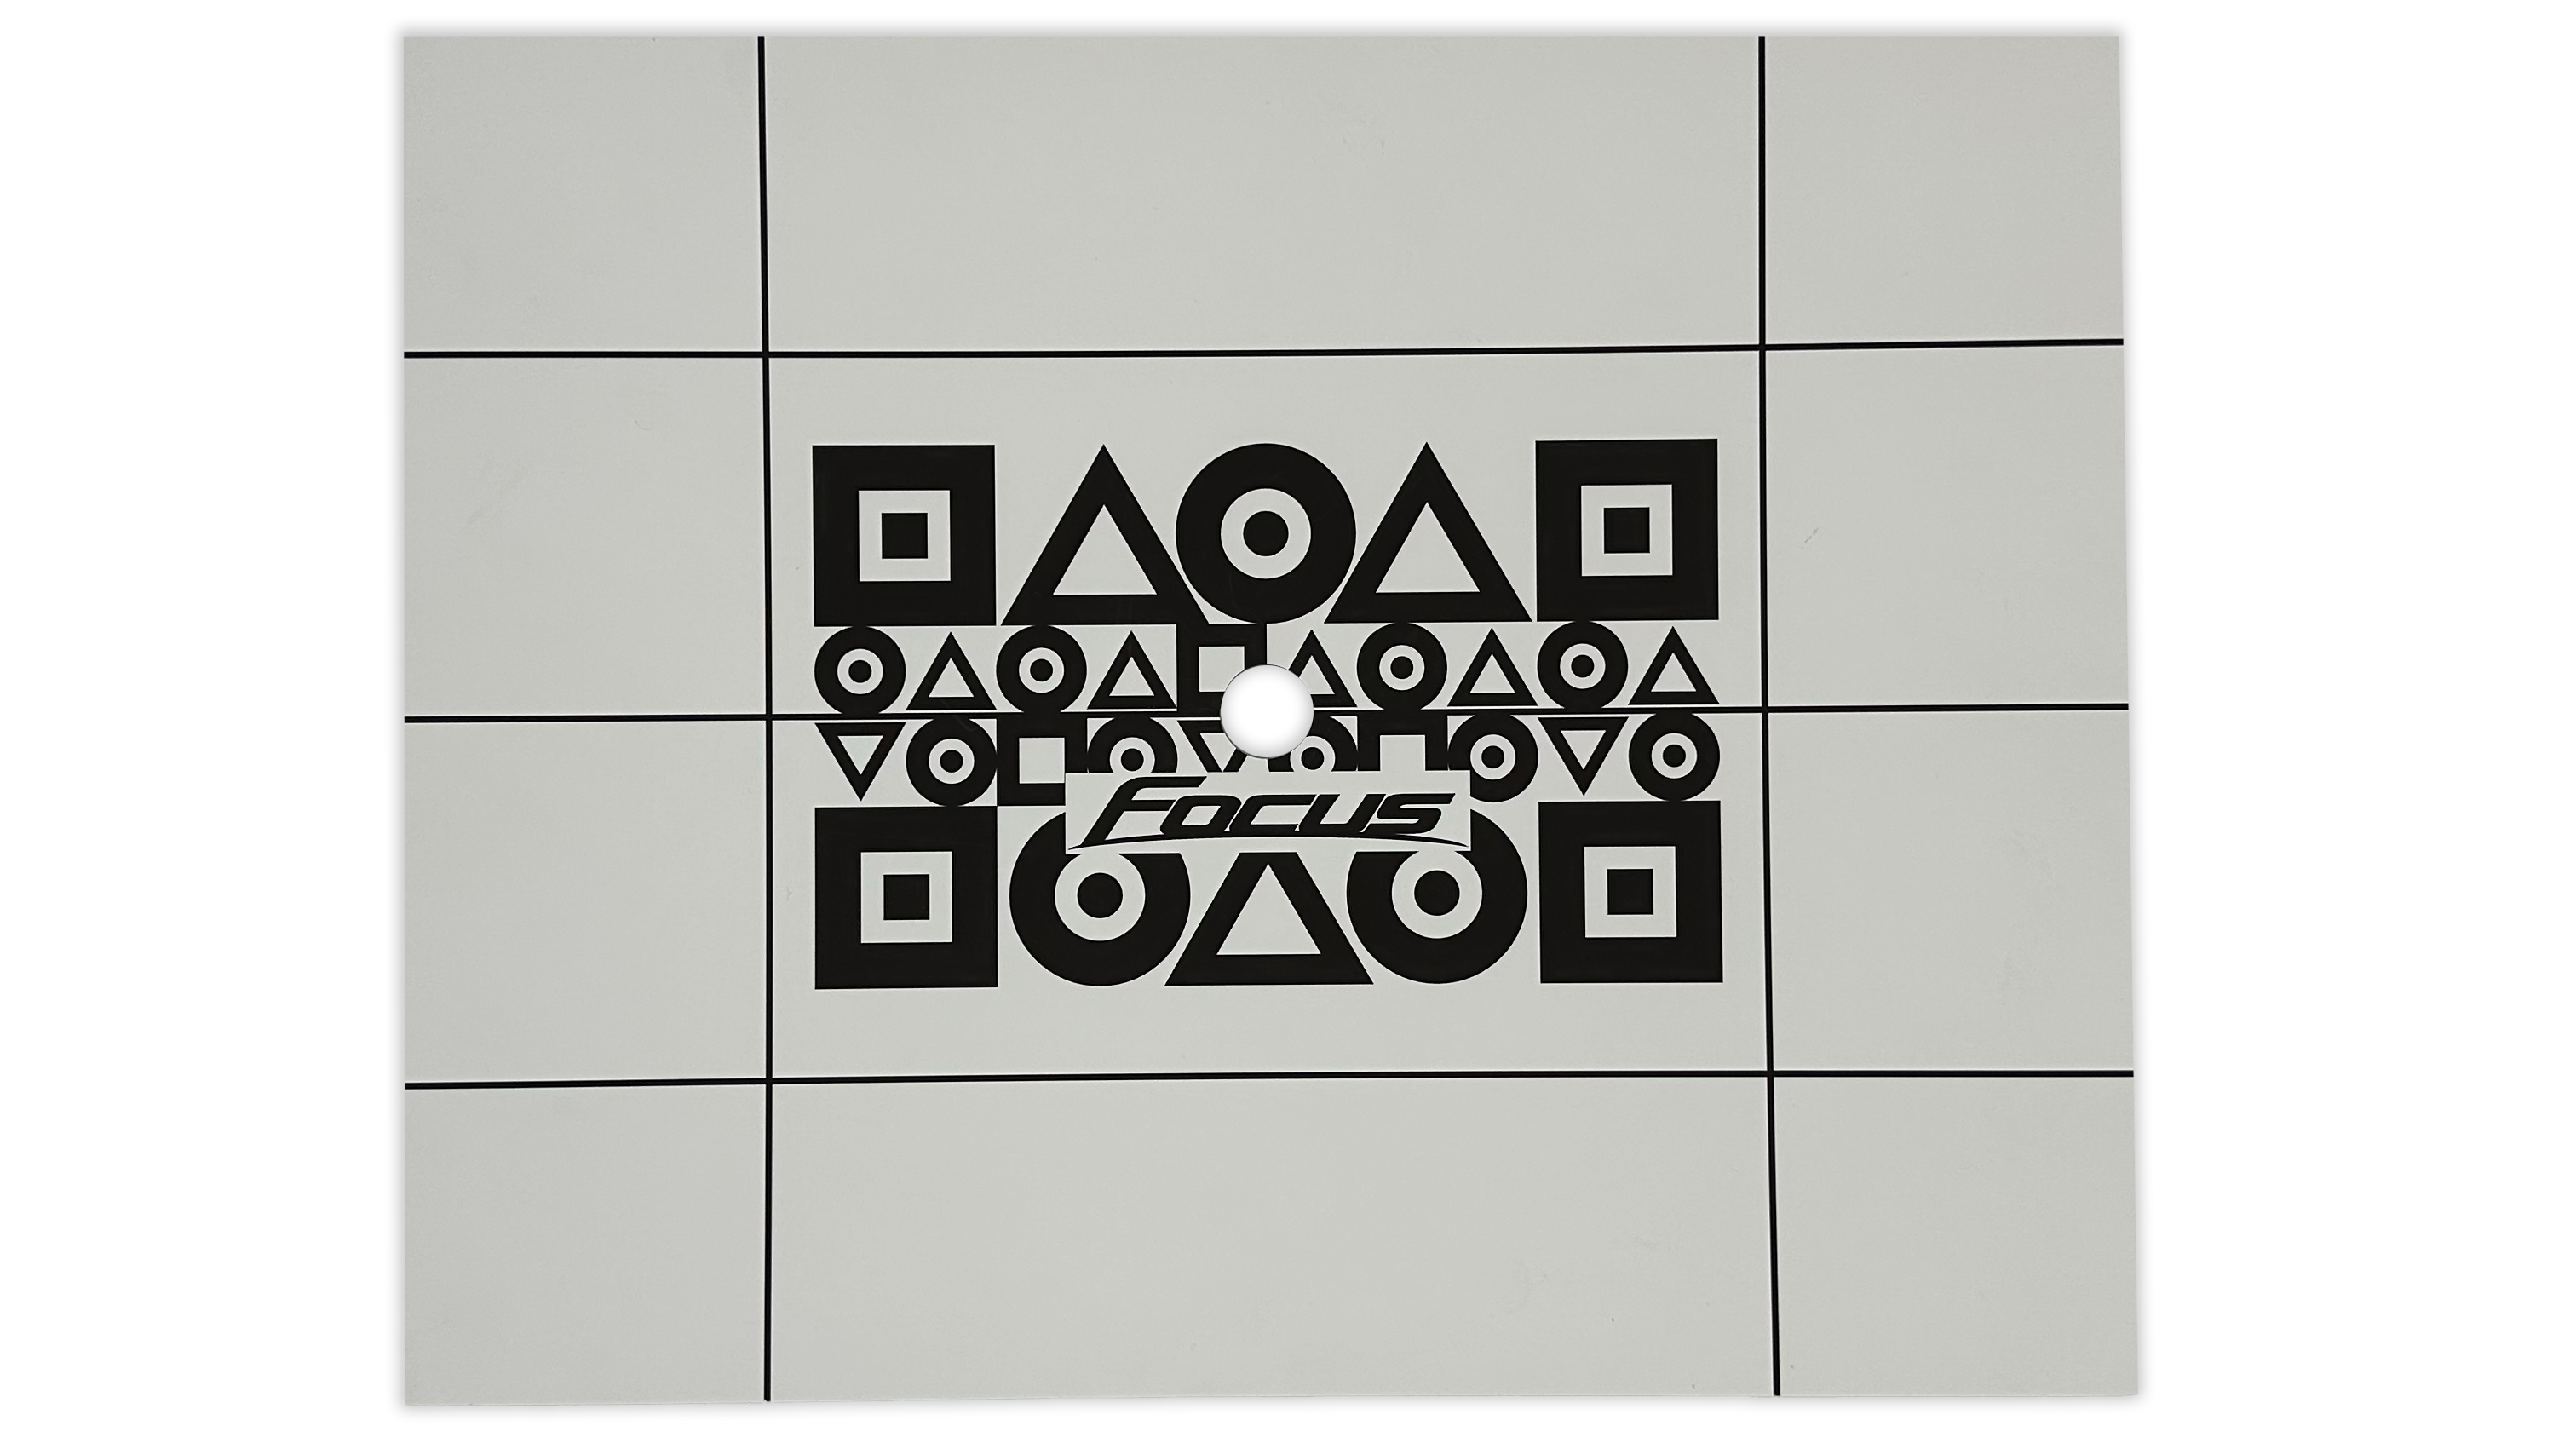
1. Place the GEOMETRIC MAT Directly below the Focus System Camera:
2. Place the laser marking device, and adjust the GEOMETRIC MAT, in order that the laser light can pass through the top center of the tee.
3. Place the laser marking device parallel to the shotmat.
4. Place the calibration board in order that the center of the board is aligned with the laser light.
SETUP PREPARATION 2:
1. Before adjusting the focus of the Focus System Camera, if the screen is too bright or too dark, follow the steps below to increase or decrease the brightness values by using < or > buttin to make sure the screen can be clearly visible to the camera:
- Gamma
- Exposure Time
- Gain
- Black Level
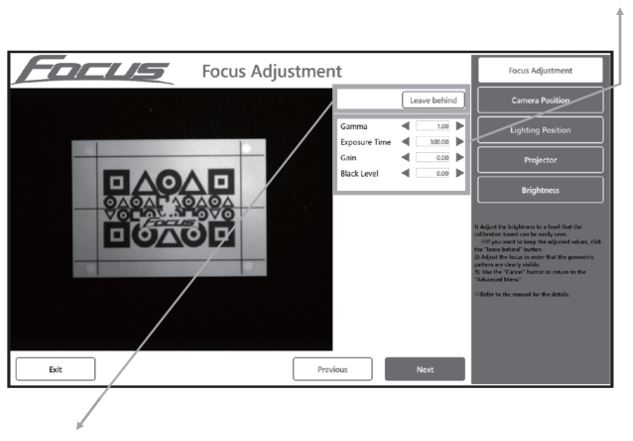
2. Select "LEAVE BEHIND" if you want to keep the settings you just adjusted for next time.
-
Adjusting Focus On Focus Lens
1. Remove the Protective Cover of the focus to access the Focus System Lens.
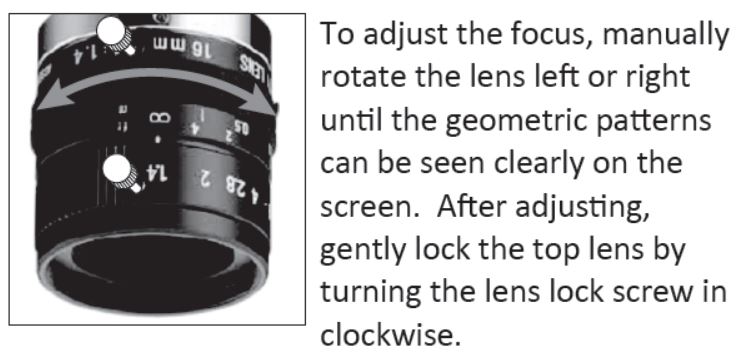
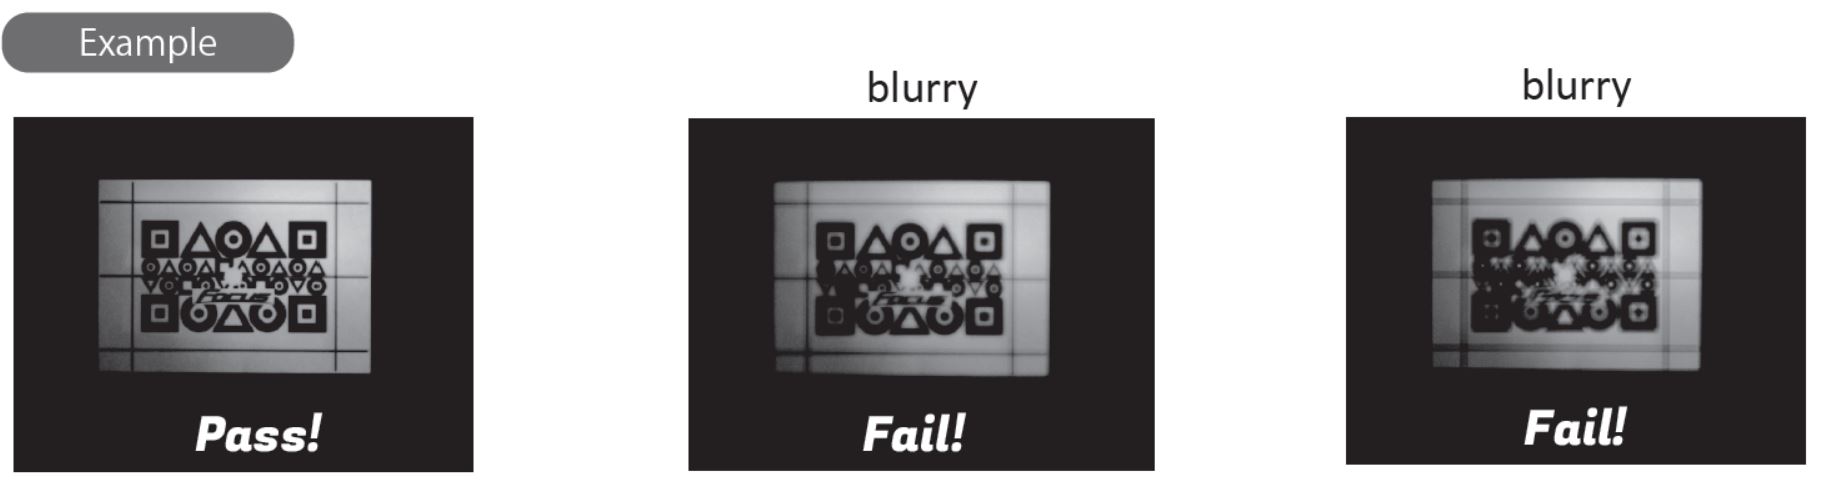
2. Adjust the Focus System Lens in order that the GEOMETRIC Patterns can be clearly seen:
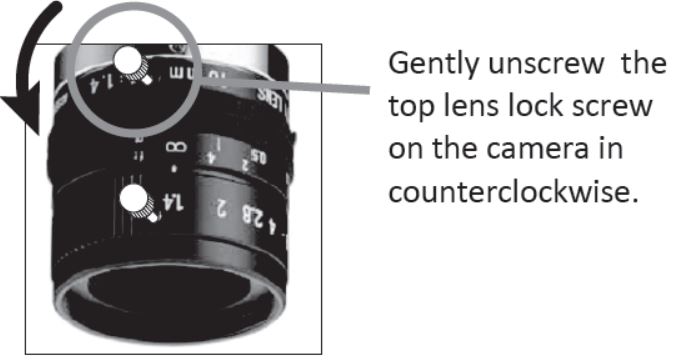
- Loosen the Lock Screw from the Lens:
- Rotate the Lens to Adjust Focus:
-
-
Camera Position Settings
-
LED Position Settings
-
Projector Position Settings
-
Brightness Adjustment