FOCUS HARDWARE INSTALLATION
-
WELCOME
WELCOME TO THE FOCUS SYSTEM!
-
SAFETY GUIDELINES
Please read the following before use.
Failure to follow the instructions could result in serious injury, property damage and/or void the device warranty.
-
Licensed Contractor Required
ALL INSTALLATIONS SHOULD BE PERFORMED BY A LICENSED CONTRACTOR
All installation work described in this guide should be performed by licensed contractors. Improper installation may result in personal injury, property damage, and void any product warranty.The installation work should be performed by at least two (2) qualified installers.
-
Ceiling Mount Precautions
- The ceiling bracket is designed specifically for mounting a FOCUS to a ceiling. Do NOT attempt to mount additional items to the provided mount, as the additional weight may result in damage and/or failure.
- Do NOT install the ceiling bracket in a location where vibration or impact shock may occur. This may result in damage to or failure of the mount.
- Prior to installing the ceiling bracket, make sure the ceiling area is strong enough to hold the FOCUS and ceiling bracket and projector. If the ceiling area is not strong enough, reinforce the area prior to installation.
- Never modify the ceiling bracket, assembly components,projector, or FOCUS.
- Do NOT install the ceiling mount and FOCUS and projector in a location where the operating temperature for the FOCUS may be exceeded. Excessive temperatures may damage the FOCUS. Install the ceiling bracket in a place free from excessive dust and humidity to prevent the lens or optical components of the FOCUS from becoming clouded or dirty.
- DO NOT use excessive force when adjusting the ceiling bracket or FOCUS or projector.
-
Components
- Handle and install the power cord carefully. Incorrect installation may result fire or electric shock. Observe the following precautions when installing:
- Do not handle any electrical components with wet hands.
- Do not use a power cord that appears to be damaged or modified.
- Tighten all screws firmly alter installation and final adjustment.
- Do NOT use adhesives, lubricants, or oils to install and/or adjust the ceiling bracket.
- Do NOT loosen the screws alter installation.
- When performing electrical installation, make sure that no wiring comes into contact with mounting or assembly screws.
-
-
CHECK ACCESSORIES

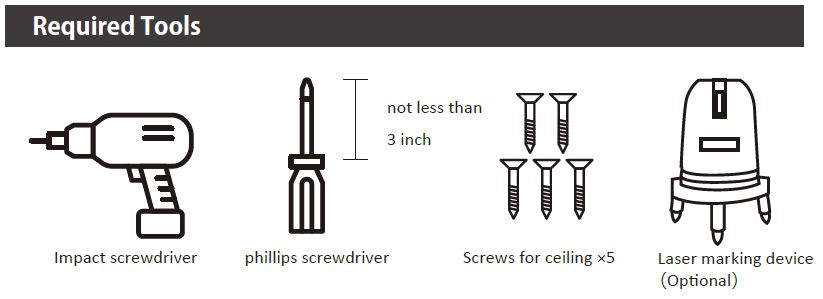
PLEASE NOTE: This installation package does NOT include screws for securing the FOCUS mount into the ceiling. Selected installation screws must be able to support a minimum of 50 lbs.
Types of screws may vary depending on ceiling material. Consult your carpenter for the right choice of screws.
-
REQUIRED TOOLS
-
INSTALLATION LAYOUT
-
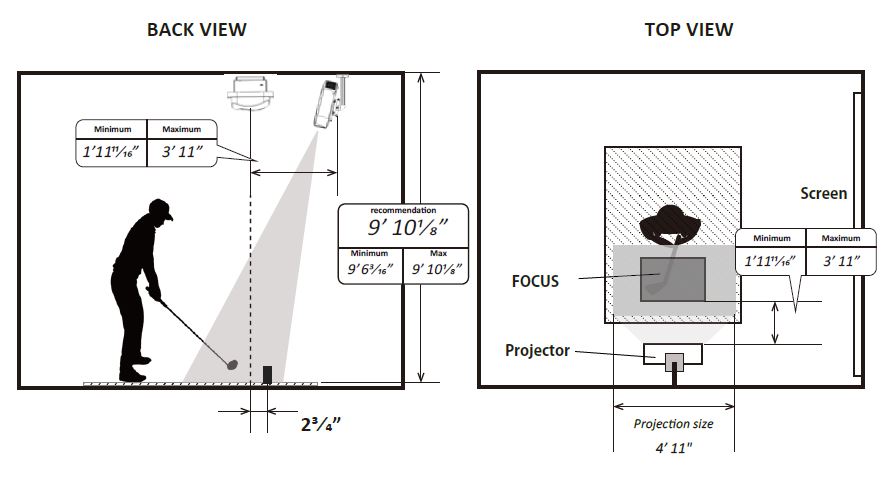
Back View & Top View
-
Wiring Layout
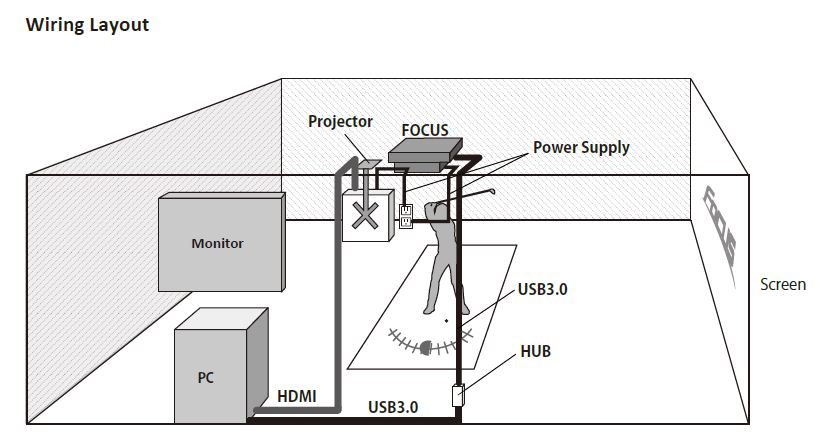
- Plug the USB cable into the USB hub and plug it in the 3.0 port on the PC.
- FOCUS is recommended to be installed at a height approximately 9’ 101⁄8” feet from the surface of the shot mat.
-
-
PC SETUP
If you intend to use more than one USB-powered device on the same PC, we recommend adding a USB 3.0 to PCI Express x1 Gen 2 Host Card.
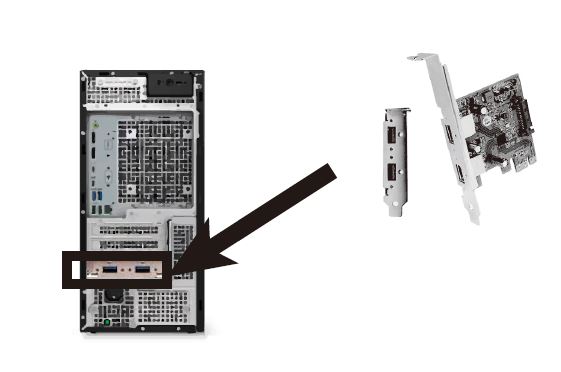
When adding more host cards, do not forget to connect them to the PC INTERNAL power supply which powers all of the internal components within your computer. .

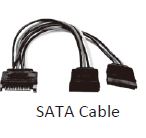
PLEASE NOTE: If the power supply supplied with the main unit interferes with the graphics board or other components, please use a SATA cable of a different type.
-
FOCUS POWER SUPPLY
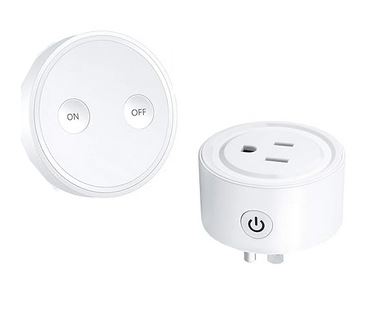
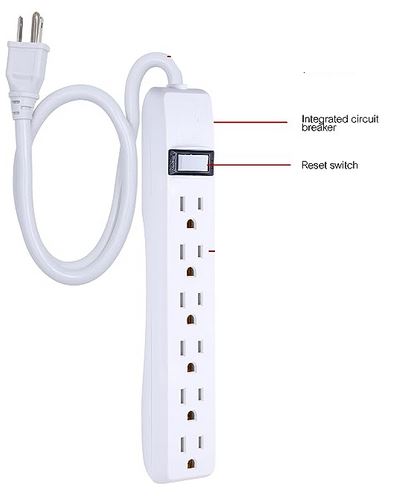
- There is no power switch on FOCUS. Unplug FOCUS after use, or incorporate an external switch.
- It is recommended to using a power strip with shut off switch or using a wireless remote control outlet power strip (Purchased Separately).
- The power cord included with this device is an integral part of the FOCUS main unit and is not universal, but specific to this product.
- NEVER use it with other power supplies or electrical equipment.
-
INSTALLATION PROCEDURE
Please refer to the pre-installation checklist and safety guidelines before proceeding.
-
Identify Camera Points
Identify camera points with a laser marker.
The FOCUS should be placed so that the center of the camera is 23⁄4" below the tee. Therefore, a laser marker is used to locate the exact camera point.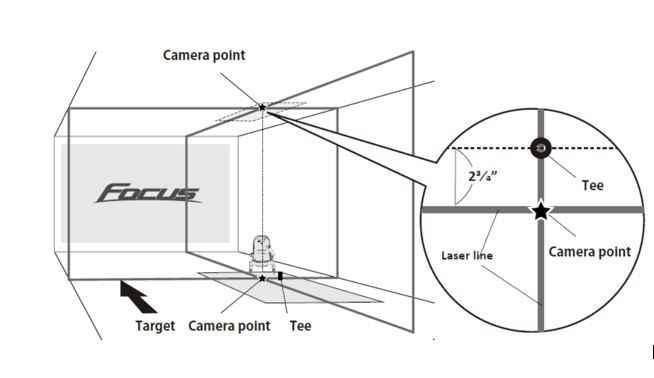
-
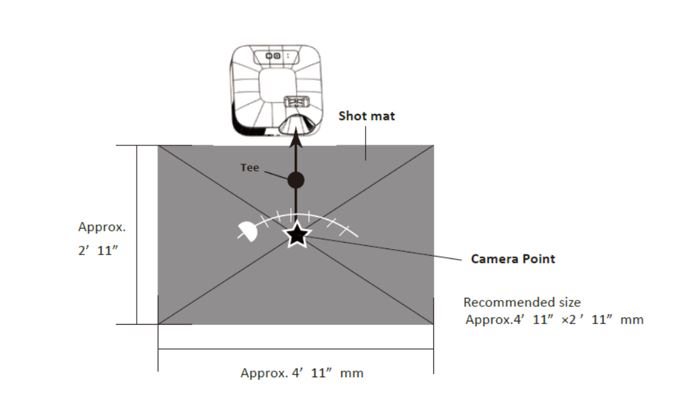
Camera Range
About the Area Range of the FOCUS Camera
The range that FOCUS can capture is shown in the figure below: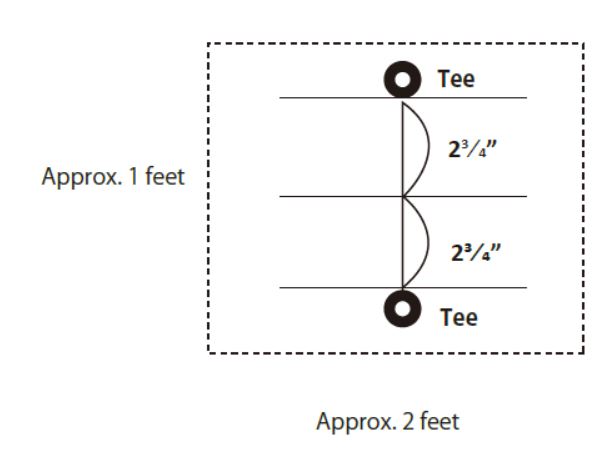
NOTICE: For left and right-handed users, it is recommended to position the tees as shown in this diagram. -
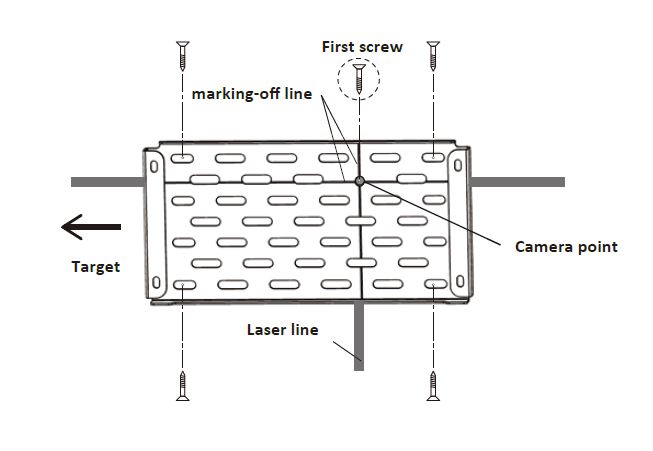
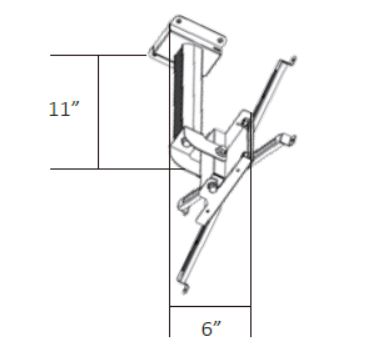
Ceiling Bracket Installation
Install the ceiling bracket.
- Align the tee points and fasten the screws.
- Then, align the laser and marking-off line and fasten with 4-point screws.
-
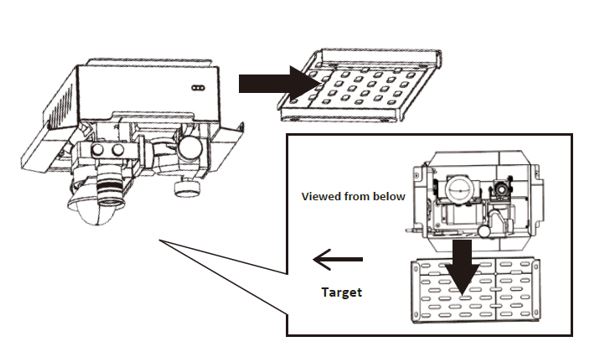
Mount FOCUS System
Slide the main unit and insert it into the ceiling bracket.
- Note the direction. Place lighting in the direction of the target.
- Make sure the camera is on the tee point.
Fix the main unit to the ceiling bracket.
- Do not Tighten only one screw.
- Use a long screwdriver to fasten the four screws a little at a time.

-
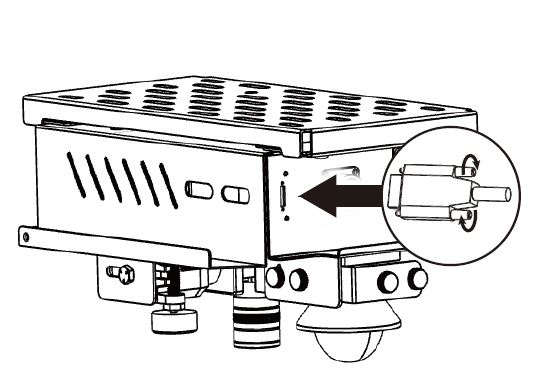
USB Connection To PC
Connect the USB cable for the FOCUS camera.- Be sure to fasten the screws attached to the cable body securely.
-
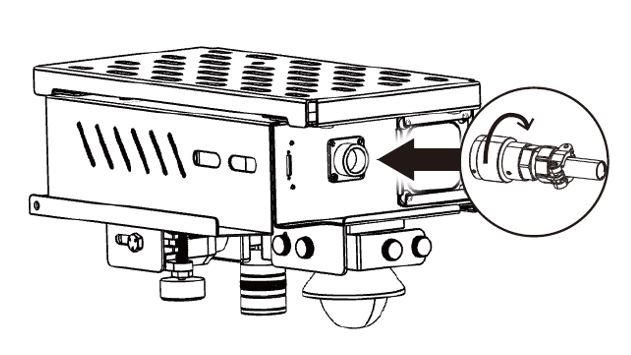
Power Connection To Focus
Connect the power cable.
- Be sure to firmly fasten the lock attached to the cable body.
-
Securing FOCUS covers
Stack the frame on the top cover.
- Note the direction. The side with the large open window is the target side (LED).
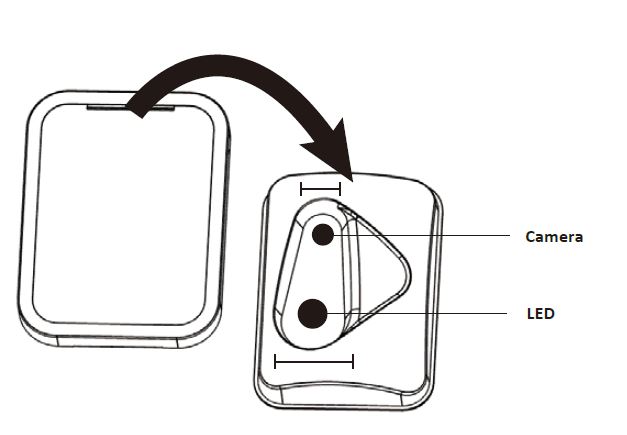
Install the case from the camera side.
 WARNING! Reversing the case may damage the LED.
- Be careful not to let the edges hit the LED.
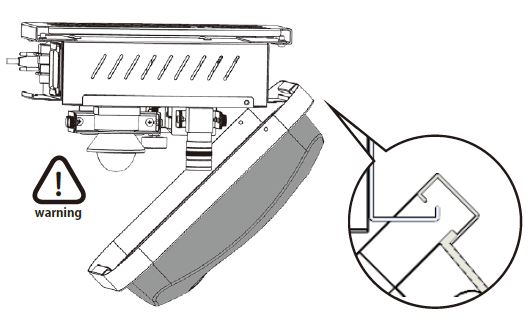
- Then, secure the frame to the main unit with 2 knurled screws to prevent it from falling.

-
-
PROJECTOR INSTALLATION
-
Projector Suspension
PROJECTOR SUSPENSION DEVICE
- Reference example: Projector mounting bracket
-
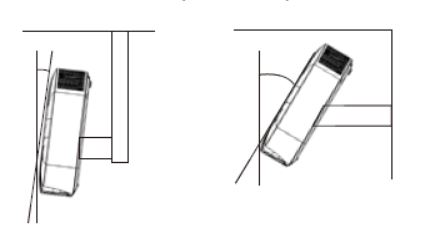
Projector Angle
- The further the projector is from the FOCUS, the more angle is required.
- If the angle is large, it is recommended to hang from the wall instead of the ceiling.
-
Projector Orientation To FOCUS
- Place the projector so that projector lens is facing the center of the shot mat.
-
-
PROJECTOR SETUP
For FOCUS to accurately perform the projection mapping, it is necessary to understand that:
- The aspect ratio of the projector is set to 16:9
- The projector has a correct keystone adjusted for the projected image
- The projector mounting bracket allows projector to be tilted for the projector calibration
- For the size of the image of the projection mapping, the width of the projected image is approximately the same for the width of the shot mat.
- The height of the ceiling to which the projector is to be mounted matches the throw-distance available with projector used.